
Skip to content

Drawing HTML Elements upwards/downwards dynamically in the Screen

This article was written over 18 months ago and may contain information that is out of date. Some content may be relevant but please refer to the relevant official documentation or available resources for the latest information.

A couple of weeks ago, I start writing a custom component that allows rendering a list of other components dynamically. One of its features shows the list up or down, according to the space available in the viewport (or the screen).

A solution to this type of problem may require the use of the web APIs available through the Window interface.

The Web APIs

API comes from Application Programming Interface, and according to MDN:

Application Programming Interfaces (APIs) are constructs made available in programming languages to allow developers to create complex functionality more easily. They abstract more complex code away from you, providing some easier syntax to use in its place.

In the same way, the Web currently comes with a large number of Web APIs we can use through JavaScript(or TypeScript). You can find more detailed information about them here.

The Window Interface

The Window interface represents a window containing a DOM document. In the practical world, we usually use the global window variable to get access to it.

For example, open the browser's console, and type the following command there:

window.document

Once you run the previous command, you should get a reference to the current document, which is contained by the window object. In Google Chrome, you'll see a selection effect applied over the whole page. Give it a try!

Let's try with another example. Type the next command in your browser's console:

window.history

The output will be something like this:
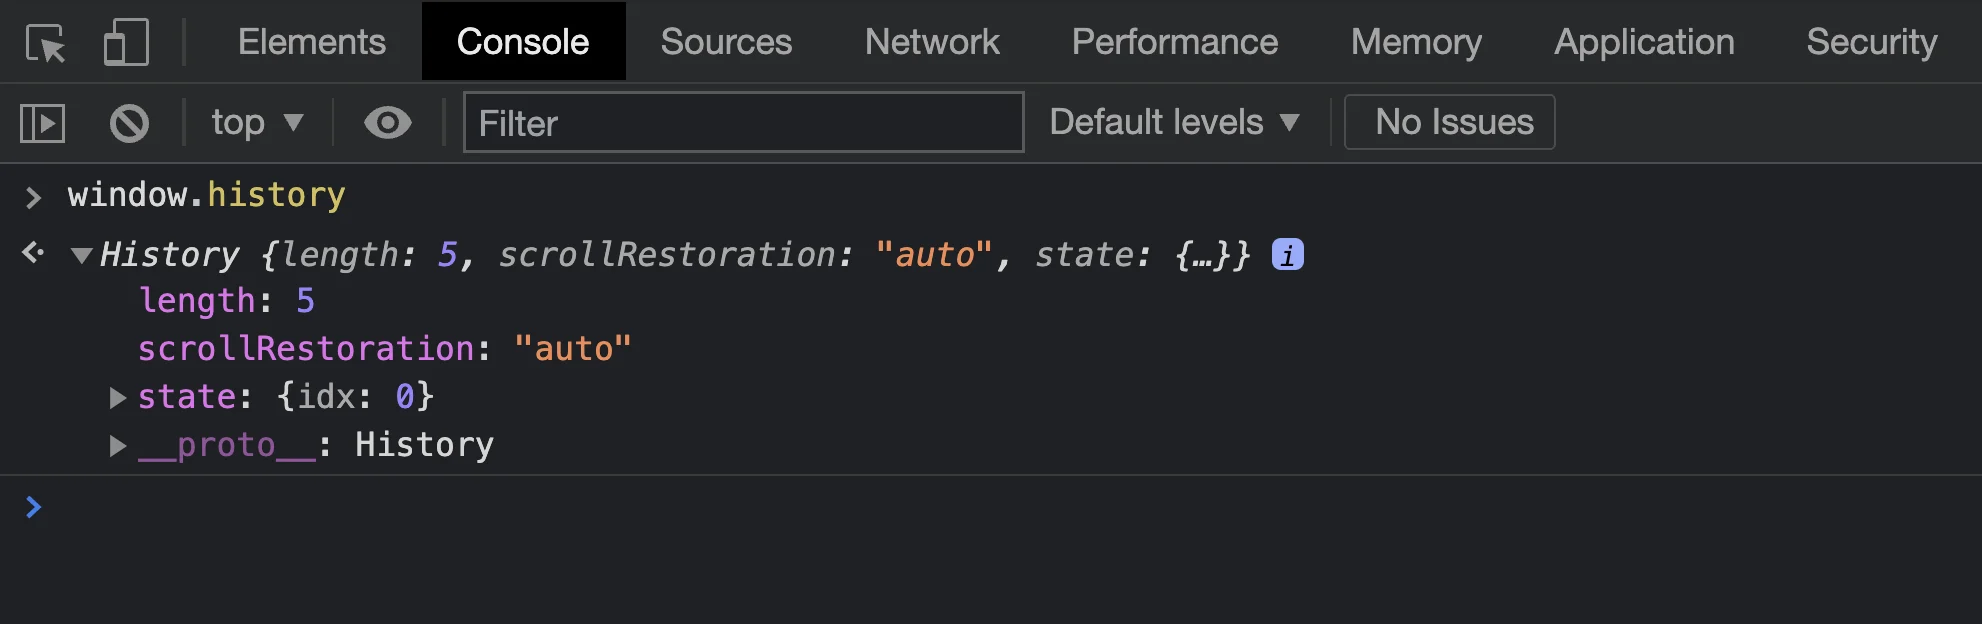
A window.history output example

As you can see, the result is a History object. This is a read-only reference, and can be used to change the current browser history as the next example shows:

const history = window.history;
history.back();

All the above examples were about access to properties. However, the window object also provides useful methods. For example:

window.open();

window.find('pattern');

The first method call will open a new window browser, and the second one will search the given string within the current view.

Using the APIs

First, let's define the HTML template of the list to be rendered dynamically:

<div class="list">
  <ul>
    <li>Item 1</li>
    <li>Item 2</li>
    <li>Item 3</li>
    <li>Item 4</li>
    <li>Item 5</li>
    <li>Item 6</li>
    <li>Item 7</li>
  </ul>
</div>

Now, let's apply some styles so that it stands out from the container.

.list {
  display: none;
  border: 1px solid #00458b;
  min-width: 200px;
  position: absolute;
  background: #eee;
}

As you may note, the list won't be rendered by default(display: none), and we're going to set its position from the code.

Listening to a Mouse Click Event

Let's create a TypeScript file (index.ts) so that we can start using the Web APIs, and the window object.

As the next step, we'll need to "catch" the mouse click event globally. Then, the window reference can be helpful for that:

// index.ts

window.addEventListener('click', (event: MouseEvent) => {
  console.log('click', event.x, event.y);
});

Once you run the previous code snippet, the browser's console will print the click event coordinates.

Getting the List from the DOM

The HTML List we created can be accessed using the following JavaScript code:

const listElement = window.document.querySelector('.list') as HTMLDivElement;
  • The window.document will return a reference to the Document object contained in the window.
  • The querySelector method will return the first element that matches with the selector(.list).
  • Since TypeScript is being used, we can use the as syntax to perform a type assertion.

Rendering the List Dynamically

Before rendering the list dynamically, we'll need to perform some calculations based on the list size, and the container.

Let's get the list size using the getBoundingClientRect() method:

const boundingRect = listElement.getBoundingClientRect() as DOMRect;

This method returns a DOMRect object, which contains the coordinates and the size of the element with other properties.

const viewportHeight = window.innerHeight;

The window.innerHeight property returns the interior height of the window, in pixels.

Let's read the mouse click event coordinates too:

let { x, y } = event;

In this case, we'll do a calculation for the y-axis coordinate:

if (event.y + boundingRect.height >= viewportHeight) {
    console.log('render upwards');
    y = y - boundingRect.height;
} else {
  console.log('render downwards');
}

The above code snippet will make sure the list can fit below. Otherwise, it will render it upwards the click position.

As a final step, we'll need to update the visibility of the list, and update the position of if after every click event:

listElement.style.display = 'block';
listElement.style.left = `${x}px`;
listElement.style.top = `${y}px`;

Live Demo

Want to play around with this code? Just open the embedded Stackblitz editor:

Conclusion

In this article, I described a useful technique to rely on existing Web APIs to solve a problem. Keep in mind this example is a proof of concept only and you may need to perform additional calculations or accessing different window properties.

Either way, feel free to reach out on Twitter if you have any questions. Follow me on GitHub to see more about my work.


This Dot is a consultancy dedicated to guiding companies through their modernization and digital transformation journeys. Specializing in replatforming, modernizing, and launching new initiatives, we stand out by taking true ownership of your engineering projects.

We love helping teams with projects that have missed their deadlines or helping keep your strategic digital initiatives on course. Check out our case studies and our clients that trust us with their engineering.

You might also like

TypeScript Integration with .env Variables cover image

TypeScript Integration with .env Variables

Introduction In TypeScript projects, effectively managing environment variables can significantly enhance the development experience. However, a common hurdle is that TypeScript, by default, doesn't recognize variables defined in .env files. This oversight can lead to type safety issues and, potentially, hard-to-trace bugs. In this blog post, we'll walk you through the process of setting up an environment.d.ts file. This simple yet powerful addition enables TypeScript to seamlessly integrate with and accurately interpret your environment variables. Let's dive into the details! Creating and Configuring environment.d.ts Install @types/node Before creating your environment.d.ts file, make sure you have the @types/node package installed as it provides TypeScript definitions for Node.js, including the process.env object. Install it as a development dependency: ` Setting Up environment.d.ts To ensure TypeScript correctly recognizes and types your .env variables, start by setting up an environment.d.ts file in your project. This TypeScript declaration file will explicitly define the types of your environment variables. 1. Create the File: In the root of your TypeScript project, create a file named environment.d.ts 2. Declare Environment Variables: In environment.d.ts, declare your environment variables as part of the NodeJS.ProcessEnv interface. For example, for API_KEY and DATABASE_URL, the file would look like this: ` 3. Typescript config: In you tsconfig.json file, ensure that Typescript will recognize our the new file: ` 4. Usage in Your Project: With these declarations, TypeScript will provide type-checking and intellisense for process.env.API_KEY and process.env.DATABASE_URL, enhancing the development experience and code safety. Checking on Your IDE By following the steps above, you can now verify on your IDE how your environment variables recognizes and auto completes the variables added: Conclusion Integrating .env environment variables into TypeScript projects enhances not only the security and flexibility of your application but also the overall developer experience. By setting up an environment.d.ts file and ensuring the presence of @types/node, you bridge the gap between TypeScript’s static type system and the dynamic nature of environment variables. This approach leads to clearer, more maintainable code, where the risks of runtime errors are significantly reduced. It's a testament to TypeScript's versatility and its capability to adapt to various development needs. As you continue to build and scale your TypeScript applications, remember that small enhancements like these can have a profound impact on your project's robustness and the efficiency of your development processes. Embrace these nuanced techniques, and watch as they bring a new level of precision and reliability to your TypeScript projects....

I Broke My Hand So You Don't Have To (First-Hand Accessibility Insights) cover image

I Broke My Hand So You Don't Have To (First-Hand Accessibility Insights)

We take accessibility quite seriously here at This Dot because we know it's important. Still, throughout my career, I've seen many projects where accessibility was brushed aside for reasons like "our users don't really use keyboard shortcuts" or "we need to ship fast; we can add accessibility later." The truth is, that "later" often means "never." And it turns out, anyone could break their hand, like I did. I broke my dominant hand and spent four weeks in a cast, effectively rendering it useless and forcing me to work left-handed. I must thus apologize for the misleading title; this post should more accurately be dubbed "second-hand" accessibility insights. The Perspective of a Developer Firstly, it's not the end of the world. I adapted quickly to my temporary disability, which was, for the most part, a minor inconvenience. I had to type with one hand, obviously slower than my usual pace, but isn't a significant part of a software engineer's work focused on thinking? Here's what I did and learned: - I moved my mouse to the left and started using it with my left hand. I adapted quickly, but the experience wasn't as smooth as using my right hand. I could perform most tasks, but I needed to be more careful and precise. - Many actions require holding a key while pressing a mouse button (e.g., visiting links from the IDE), which is hard to do with one hand. - This led me to explore trackpad options. Apart from the Apple Magic Trackpad, choices were limited. As a Windows user (I know, sorry), that wasn't an option for me. I settled for a cheap trackpad from Amazon. A lot of tasks became easier; however, the trackpad eventually malfunctioned, sending me back to the mouse. - I don't know a lot of IDE shortcuts. I realized how much I've been relying on a mouse for my work, subconsciously refusing to learn new keyboard shortcuts (I'll be returning my senior engineer license shortly). So I learned a few new ones, which is good, I guess. - Some keyboard shortcuts are hard to press with one hand. If you find yourself in a similar situation, you may need to remap some of them. - Copilot became my best friend, saving me from a lot of slow typing, although I did have to correct and rewrite many of its suggestions. The Perspective of a User As a developer, I was able to get by and figure things out to be able to work effectively. As a user, however, I got to experience the other side of the coin and really feel the accessibility (or lack thereof) on the web. Here are a few insights I gained: - A lot of websites apparently _tried_ to implement keyboard navigation, but failed miserably. For example, a big e-commerce website I tried to use to shop for the aforementioned trackpad seemed to work fine with keyboard navigation at first, but once I focused on the search field, I found myself unable to tab out from it. When you make the effort to implement keyboard navigation, please make sure it works properly and it doesn't get broken with new changes. I wholeheartedly recommend having e2e tests (e.g. with Playwright) that verify the keyboard navigation works as expected. - A few websites and web apps I tried to use were completely unusable with the keyboard and were designed to be used with a mouse only. - Some sites had elaborate keyboard navigation, with custom keyboard shortcuts for different functionality. That took some time to figure out, and I reckon it's not as intuitive as the designers thought it would be. Once a user learns the shortcuts, however, it could make their life easier, I suppose. - A lot of interactive elements are much smaller than they should be, making it hard to accurately click on them with your weaker hand. Designers, I beg you, please make your buttons bigger. I once worked on an application that had a "gloves mode" for environments where the operators would be using gloves, and I feel like maybe the size we went with for the "gloves mode" should be the standard everywhere, especially as screens get bigger and bigger. - Misclicking is easy, especially using your weaker hand. Be it a mouse click or just hitting an Enter key on accident. Kudos to all the developers who thought about this and implemented a confirmation dialog or other safety measures to prevent users from accidentally deleting or posting something. I've however encountered a few apps that didn't have any of these, and those made me a bit anxious, to be honest. If this is something you haven't thought about when developing an app, please start doing so, you might save someone a lot of trouble. Some Second-Hand Insights I was only a little bit impaired by being temporarily one-handed and it was honestly a big pain. In this post, I've focused on my anecdotal experience as a developer and a user, covering mostly keyboard navigation and mouse usage. I can only imagine how frustrating it must be for visually impaired users, or users with other disabilities, to use the web. I must confess I haven't always been treating accessibility as a priority, but I've certainly learned my lesson. I will try to make sure all the apps I work on are accessible and inclusive, and I will try to test not only the keyboard navigation, ARIA attributes, and other accessibility features, but also the overall experience of using the app with a screen reader. I hope this post will at least plant a little seed in your head that makes you think about what it feels like to be disabled and what would the experience of a disabled person be like using the app you're working on. Conclusion: The Humbling Realities of Accessibility The past few weeks have been an eye-opening journey for me into the world of accessibility, exposing its importance not just in theory but in palpable, daily experiences. My short-term impairment allowed me to peek into a life where simple tasks aren't so simple, and convenient shortcuts are a maze of complications. It has been a humbling experience, but also an illuminating one. As developers and designers, we often get caught in the rush to innovate and to ship, leaving behind essential elements that make technology inclusive and humane. While my temporary disability was an inconvenience, it's permanent for many others. A broken hand made me realize how broken our approach towards accessibility often is. The key takeaway here isn't just a list of accessibility tips; it's an earnest appeal to empathize with your end-users. "Designing for all" is not a checkbox to tick off before a product launch; it's an ongoing commitment to the understanding that everyone interacts with technology differently. When being empathetic and sincerely thinking about accessibility, you never know whose life you could be making easier. After all, disability isn't a special condition; it's a part of the human condition. And if you still think "Our users don't really use keyboard shortcuts" or "We can add accessibility later," remember that you're not just failing a compliance checklist, you're failing real people....

How to Update the Application Title based on Routing Changes in Angular cover image

How to Update the Application Title based on Routing Changes in Angular

Have you tried to update the document's title of your application? Maybe you're thinking that applying interpolation should be enough: ` That solution is not going to work since the element is outside of the scope of the Angular application. In fact, the root component of your app is within tag, and the title is part of the element. Luckily, Angular provides the Title service with the methods to read the current title of the application, and a setTitle(title) to update that value. However, what happens if you need to update the title on routing changes? Also, you may consider updating it on certain components for Analytics purposes. In this blog post, I'll explain step-by-step how to create a custom Title service to have full control over the title of the current HTML document for your application. Project Setup Prerequisites You'll need to have installed the following tools in your local environment: - Node.js. Preferably the latest LTS version. - A package manager. You can use either NPM or Yarn. This tutorial will use NPM. Creating the Angular Project Let's assume we'll need to build an application with the following routes as requirements: ` Now, let's create the project from scratch using the Angular CLI tool. ` This command will initialize a base project using some configuration options: - --routing. It will create a routing module. - --prefix corp. It defines a prefix to be applied to the selectors for created components(corp in this case). The default value is app. - --style css. The file extension for the styling files. - --skip-tests. it avoids the generations of the .spec.ts files, which are used for testing Creating the Modules and Components Once we got the initial structure of the app, we'll continue running the following commands to create a separate module for /home and /products, which are the main paths of the project: ` * The --routing flag can be using also along with ng generate module to create a routing configuration file for that module. Creating the Title Service Similar to the previous section, we will create a shared module to hold the Title service. Both can be generated with the following commands: ` * The --module app flag is used to "link" the brand new module to the pre-existing app.module.ts file. The Routing Configuration Open the app-routing.module.ts file, and create the initial routes. ` * By default, the application will redirect to the home path. * When the router loads the home path, a HomeComponent will be rendered. * The products path will be loaded using the _lazy loading_ feature. Pay attention to the data provided to the home path. It contains the configured title through pageTitle string. Next, open the products-routing.module.ts file to enable an additional configuration to load the _Products_ and the _Product Detail_ page. ` * The router will render the ProductsComponent by default when the path matches to /products. This route also defines custom data to be rendered as titles later. * When the path also adds an Id on /products/:id, the router will render the ProductDetailComponent. The Title Service Implementation It's time to implement the custom Title Service for our application. ` The above service implementation could be understood in just a few steps. * First, we'll need to make sure to inject the Router, ActivatedRoute and Title services in the constructor. * The title$ attribute contains the initial value for the title("Corp"), which will be emitted through a _BehaviorSubject_. * The titleRoute$ is an Observable ready to emit any pageTitle value defined in the current route. It may use the parent's _pageTitle_ otherwise. * The titleState$ is an Observable ready to _listen_ to either title$ or titleRoute$ values. In case incoming value is defined, it will call the Angular Title service to perform the update. * The getPageTitle method will be in charge of obtaining the pageTitle of the current route if it is defined or the title of the parent otherwise. Injecting the Title Service One easy way to apply the custom Title Service in the whole application is by updating the app.module.ts file and injecting it into the constructor. ` In that way, once the default component gets rendered, the title will be displayed as Corp - Home. If you click on _Go to Products_ link, then a redirection will be performed and the Title service will be invoked again to display Corp - Products at this time. However, we may need to render a different title according to the product detail. In this case, we'll show Corp - Product Detail - :id where the Id matches with the current route parameter. ` Let's explain the implementation of this component: * The constructor injects the ActivatedRoute and the custom TitleService. * The productId$ is the _Observable_ which is going to emit the Id parameter every time it changes in the URL. * Once the component gets initialized, we'll need to _subscribe_ to the productId$ _Observable_ and then emit a new value for the title after creating a new string using the id. That's possible through the titleService.title$.next() method. * When the component gets _destroyed_, we'll need to _unsubscribe_ from the productIdSubscription. We're ready to go! Every time you select a product, the ProductDetail component will be rendered, and the title will be updated accordingly. Live Demo and Source Code Want to play around with the final application? Just open the following link in your browser: https://luixaviles.github.io/angular-update-title. Find the complete angular project in this GitHub repository: angular-update-title-service. Do not forget to give it a star ⭐️, and play around with the code. Feel free to reach out on Twitter if you have any questions. Follow me on GitHub to see more about my work....

What does it actually look like to build software with AI today? Not in theory, but in practice. cover image

What does it actually look like to build software with AI today? Not in theory, but in practice.

What does it actually look like to build software with AI today? Not in theory, but in practice. At the Leadership Exchange, this was the question at the center of the Developer Panel, where leaders from across the industry unpacked what’s really changing inside engineering teams and what organizations need to do right now to keep up. The Developer Panel at the Leadership Exchange explored the cutting edge of AI in software engineering and examined what organizations should focus on today to prepare for the future. Moderated by Jeff Cross, Co-Founder & CEO at Nx, the panel featured Victor Savkin, Cofounder & CTO at Nx, Alex Sover, Vice President of Engineering at OpenAP, Brent Zucker, Senior Director of Engineering at Visa, and Jonathan Fontanez, AI Engineering Lead at This Dot Labs. Panelists shared insights into how AI is transforming the software development lifecycle and how teams can adopt tools effectively while preparing for organizational change. Panelists discussed emerging workflows, including CI-in-the-loop, agentic healing, and context engineering. They examined how validation, code reviews, and PRDs are evolving alongside AI capabilities and how teams are integrating external sources such as production traces to improve quality and reliability. The discussion also covered what the next generation of agentic tools might look like and how these capabilities will shape engineering practices in the near future. Adoption of AI comes with challenges. Teams often rely on plugins or extensions without foundational understanding, and individual contributors may fear displacement. Panelists emphasized that education, governance, and skill-building are essential for teams to manage AI agents effectively while maintaining quality. They also highlighted the need to standardize workflows and ensure organizational alignment to fully leverage AI capabilities. The conversation extended beyond technical challenges to organizational implications. Panelists discussed how teams can avoid issues like Conway’s Law, manage distributed teams effectively, and evolve engineering practices alongside AI adoption. Leadership and management strategies play a crucial role in ensuring that AI integration delivers meaningful outcomes while maintaining efficiency and alignment with business objectives. Key Takeaways - AI workflows require both technical and organizational preparation. - Education, governance, and skill development are essential for successful implementation. - Forward-looking teams are rethinking validation, CI pipelines, and context management to fully leverage agentic AI. The discussion highlighted that adopting AI at the cutting edge is not just about new tools - it is about rethinking processes, workflows, and organizational culture. Companies that embrace this holistic approach are most likely to succeed in leveraging AI to its full potential. Are you interested in more conversations like this? Message us for an invite to the next, or for a private discussion around these topics. Tracy can be reached at tlee@thisdot.co....

Let's innovate together!

We're ready to be your trusted technical partners in your digital innovation journey.

Whether it's modernization or custom software solutions, our team of experts can guide you through best practices and how to build scalable, performant software that lasts.

Prefer email? hi@thisdot.co