Skip to content

Utilizing AWS Cognito for Authentication

This article was written over 18 months ago and may contain information that is out of date. Some content may be relevant but please refer to the relevant official documentation or available resources for the latest information.

Utilizing AWS Cognito for Authentication

AWS Cognito, one of the most popular services of the Amazon Web Services, is at the heart of many web and mobile applications, providing numerous useful user identity and data security features. It is designed to simplify the process of user authentication and authorization, and many developers decide to use it instead of developing their own solution.

"Never roll out your own authentication" is a common phrase you'll hear in the development community, and not without a reason. Building an authentication system from scratch can be time-consuming and error-prone, with a high risk of introducing security vulnerabilities. Existing solutions like AWS Cognito have been built by expert teams, extensively tested, and are constantly updated to fix bugs and meet evolving security standards.

Here at This Dot, we've used AWS Cognito together with Amplify in many of our projects, including Let's Chat With, an application that we recently open-sourced. In this blog post, we'll show you how we accomplished that, and how we used various Cognito configuration options to tailor the experience to our app.

Setting Up Cognito

Setting up Cognito is relatively straightforward, but requires several steps. In Let's Chat With, we set it up as follows:

  1. Sign in to the AWS Console, then open Cognito.
  2. Click the "Create user pool" to create a user pool. User Pools are essentially user directories that provide sign-up and sign-in options, including multi-factor authentication and user-profile functionality.
  3. In the first step, as a sign-in option, select "Email", and click "Next".
  4. Choose "Cognito defaults" as the password policy "No MFA" for multi-factor authentication. Leave everything else at the default, and click "Next".
  5. In the "Configure sign-up experience" step, leave everything at the default settings.
  6. In the "Configure message delivery" step, select "Send email with Cognito".
  7. In the "Integrate your app" step, just enter names for your user pool and app client. For example, the user pool might be named "YourAppUserPool_Dev", while the app client could be named "YourAppFrontend_Dev".
  8. In the last step, review your settings and create the user pool.

After the user pool is created, make note of its user pool ID:

as well as the client ID of the app client created under the user pool:

These two values will be passed to the configuration of the Cognito API.

Using the Cognito API

Let's Chat With is built on top of Amplify, AWS's collection of various services that make development of web and mobile apps easy. Cognito is one of the services that powers Amplify, and Amplify's SDK is offers some helper methods to interact with the Cognito API.

In an Angular application like Let's Chat With, the initial configuration of Cognito is typically done in the main.ts file as shown below:

// apps/admin/src/main.ts

Amplify.configure({
    Auth: {
      userPoolId: process.env.USER_POOL_ID,
      userPoolWebClientId: process.env.USER_POOL_WEB_CLIENT_ID,
    }
  }
);

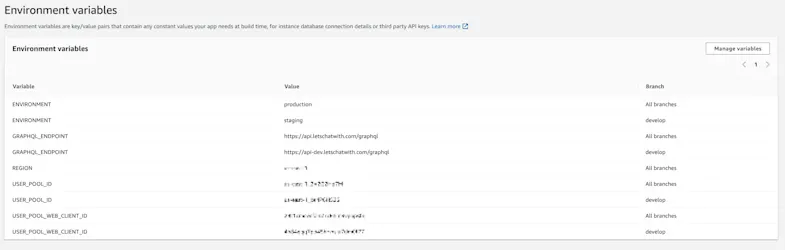
How the user pool ID and user pool web client ID are injected depends on your deployment option. In our case, we used Amplify and defined the environment variables for injection into the built app using Webpack.

Once Cognito is configured, you can utilize its authentication methods from the Auth class in the @aws-amplify/auth package. For example, to sign in after the user has submitted the form containing the username and password, you can use the Auth.signIn(email, password) method as shown below:

// libs/core/src/lib/amplify/auth.service.ts

@Injectable({
  providedIn: 'root',
})
export class AuthService {
  constructor(private transloco: TranslocoService) {}

  signInAdmin(email: string, password: string): Observable<CoreUser> {
    return from(Auth.signIn(email, password)).pipe(
      switchMap(() => {
        return this.isAdmin().pipe(
          switchMap((isAdmin) => {
            if (isAdmin) {
              return this.getCurrentUser();
            }
            throw new Error(this.transloco.translate('userAuth.errors.notAdmin'));
          })
        );
      })
    );
  }

  getCurrentUser(): Observable<CoreUser> {
    return from(Auth.currentUserInfo()).pipe(
      filter((user) => !!user),
      map((user) => this.cognitoToCoreUser(user))
    );
  }

  cognitoToCoreUser(cognitoUser: AmplifyCognitoUser): CoreUser {
    return {
      cognitoId: cognitoUser.username,
      emailVerified: cognitoUser.attributes.email_verified,
    };
  }  
}

The logged-in user object is then translated to an instance of CoreUser, which represents the internal representation of the logged-in user.

The AuthService class contains many other methods that act as a facade over the Amplify SDK methods. This service is used in authentication effects since Let's Chat With is based on NgRx and implements many core functionalities through NgRx effects:

@Injectable()
export class AuthEffects implements OnInitEffects {
  public signIn$ = createEffect(() =>
    this.actions$.pipe(
      ofType(SignInActions.userSignInAttempted),
      withLatestFrom(this.store.select(AuthSelectors.selectRedirectUrl)),
      exhaustMap(([{ email, password }, redirectUrl]) =>
        this.authService.signInAdmin(email, password).pipe(
          map((user) => AuthAPIActions.userLoginSuccess({ user })),
          tap(() => void this.router.navigateByUrl(redirectUrl || '/reports')),
          catchError((error) =>
            of(
              AuthAPIActions.userSignInFailed({
                errors: [error.message],
                email,
              })
            )
          )
        )
      )
    )
  );
}

The login component triggers a SignInActions.userSignInAttempted action, which is processed by the above effect. Depending on the outcome of the signInAdmin call in the AuthService class, the action is translated to either AuthAPIActions.userLoginSuccess or AuthAPIActions.userSignInFailed.

The remaining user flows are implemented similarly:

  • Clicking signup triggers the Auth.signUp method for user registration.
  • Signing out is done using Auth.signOut.

Reacting to Cognito Events

How can you implement additional logic when a signup occurs, such as saving the user to the database? While you can use an NgRx effect to call a backend service for that purpose, it requires additional effort and may introduce a security vulnerability since the endpoint needs to be open to the public Internet. In Let's Chat With, we used Cognito triggers to perform this logic within Cognito without the need for extra API endpoints. Cognito triggers are a powerful feature that allows developers to run AWS Lambda functions in response to specific actions in the authentication and authorization flow.

Triggers are configured in the "User pool properties" section of user pools in the AWS Console. We have a dedicated Lambda function that runs on post-authentication or post-confirmation events:

The Lambda function first checks if the user already exists. If not, it inserts a new user object associated with the Cognito user into a DynamoDB table. The Cognito user ID is read from the event.request.userAttributes.sub property.

async function handler(event, context) {
  const owner = event.request.userAttributes.sub;

  if (owner) {
    const user = await getUser({ owner });
    if (user == null) {
      await addUser({ owner, notificationConfig: DEFAULT_NOTIFICATION_CONFIG });
    }
    context.done(null, event);
  } else {
    context.done(null, event);
  }
}

async function getUser({ owner }) {
  const params = {
    ExpressionAttributeNames: { '#owner': 'owner' },
    ExpressionAttributeValues: { ':owner': owner },
    KeyConditionExpression: '#owner = :owner',
    IndexName: 'byOwner',
    TableName: process.env.USER_TABLE_NAME,
  };
  const { Items } = await documentClient().query(params).promise();
  return Items.length ? Items[0] : null;
}

async function addUser(user) {
  const { owner, notificationConfig } = user;
  const date = new Date();

  const params = {
    Item: {
      id: uuidv4(),
      __typename: 'User',
      owner: owner,
      notificationConfig: notificationConfig,
      createdAt: date.toISOString(),
      updatedAt: date.toISOString(),
      termsAccepted: false,
    },
    TableName: process.env.USER_TABLE_NAME,
  };
  await documentClient().put(params).promise();
}

Customizing Cognito Emails

Another Cognito trigger that we found useful for Let's Chat With is the "Custom message" trigger. This trigger allows you to customize the content of verification emails or messages for your app. When a user attempts to register or perform an action that requires a verification message, the trigger is activated, and your Lambda function is invoked.

Our Lambda function reads the verification code and the email from the event, and creates a custom-designed email message using the template() function. The template reads the HTML template embedded in the Lambda.

exports.handler = async (event, context) => {
  try {
    if (event.triggerSource === 'CustomMessage_SignUp') {
      const { codeParameter } = event.request;
      const { email } = event.request.userAttributes;
      const encodedEmail = encodeURIComponent(email);
      const link = `${process.env.REDIRECT_URL}email=${encodedEmail}&code=${codeParameter}`;
      const createdAt = new Date();
      const year = createdAt.getFullYear();

      event.response.emailSubject = 'Your verification code';
      event.response.emailMessage = template(email, codeParameter, link, year);
    }
    context.done(null, event);
    console.log(`Successfully sent custom message after signing up`);
  } catch (err) {
    context.done(null, event);
    console.error(
      `Error when sending custom message after signing up`,
      JSON.stringify(err, null, 2)
    );
  }
};

const template = (email, code, link, year) => `<html>
  <body style="background-color:#333; font-family: PT Sans,Trebuchet MS,sans-serif; ">
    ...
  </body>
</html>`;

Conclusion

Cognito has proven to be reliable and easy to use while developing Let's Chat With. By handling the intricacies of user authentication, it allowed us to focus on developing other features of the application. The next time you create a new app and user authentication becomes a pressing concern. Remember that you don't need to build it from scratch. Give Cognito (or a similar service) a try. Your future self, your users, and probably your sanity will thank you.

If you're interested in the source code for Let's Chat With, check out its GitHub repository. Contributions are always welcome!

This Dot is a consultancy dedicated to guiding companies through their modernization and digital transformation journeys. Specializing in replatforming, modernizing, and launching new initiatives, we stand out by taking true ownership of your engineering projects.

We love helping teams with projects that have missed their deadlines or helping keep your strategic digital initiatives on course. Check out our case studies and our clients that trust us with their engineering.

You might also like

How to automatically deploy your full-stack JavaScript app with AWS CodePipeline cover image

How to automatically deploy your full-stack JavaScript app with AWS CodePipeline

How to automatically deploy your full-stack JavaScript app from an NX monorepo with AWS CodePipeline In our previous blog post (How to host a full-stack JavaScript app with AWS CloudFront and Elastic Beanstalk) we set up a horizontally scalable deployment for our full-stack javascript app. In this article, we would like to show you how to set up AWS CodePipeline to automatically deploy changes to the application. APP Structure Our application is a simple front-end with an API back-end set up in an NX monorepo. The production built API code is hosted in Elastic Beanstalk, while the front-end is stored in S3 and hosted through CloudFront. Whenever we are ready to make a new release, we want to be able to deploy the new API and front-end versions to the existing distribution. In this article, we will set up a CodePipeline to deploy changes to the main branch of our connected repository. CodePipeline CodeBuild and the buildspec file First and foremost, we should set up the build job that will run the deploy logic. For this, we are going to need to use CodeBuild. Let's go into our repository and set up a build-and-deploy.buildspec.yml file. We put this file under the tools/aws/ folder. ` This buildspec file does not do much so far, we are going to extend it. In the installation phase, it will run npm ci to install the dependencies and in the build phase, we are going to run the build command using the ENVIRONMENT_TARGET variable. This is useful, because if you have more environments, like development and staging you can have different configurations and builds for those and still use the same buildspec file. Let's go to the Codebuild page in our AWS console and create a build project. Add a descriptive name, such as your-appp-build-and-deploy. Please provide a meaningful description for your future self. For this example, we are going to restrict the number of concurrent builds to 1. The next step is to set up the source for this job, so we can keep the buildspec file in the repository and make sure this job uses the steps declared in the yaml file. We use an access token that allows us to connect to GitHub. Here you can read more on setting up a GitHub connection with an access token. You can also connect with Oauth, or use an entirely different Git provider. We set our provider to GitHub and provided the repository URL. We also set the Git clone depth to 1, because that makes checking out the repo faster. In the Environment section, we recommend using an AWS CodeBuild managed image. We use the Ubuntu Standard runtime with the aws/codebuild/standard:7.0 version. This version uses Node 18. We want to always use the latest image version for this runtime and as the Environment type we are good with Linux EC2. We don't need elevated privileges, because we won't build docker images, but we do want to create a new service role. In the Buildspec section select Use a buildspec file and give the path from your repository root as the Buildspec name. For our example, it is tools/aws/build-and-deploy.buildspec.yml. We leave the Batch configuration and the Artifacts sections as they are and in the Logs section we select how we want the logs to work. For this example, to reduce cost, we are going to use S3 logs and save the build logs in the aws-codebuild-build-logs bucket that we created for this purpose. We are finished, so let's create the build project. CodePipeline setup To set up automated deployment, we need to create a CodePipeline. Click on Create pipeline and give it a name. We also want a new service role to be created for this pipeline. Next, we should set up the source stage. As the source provider, we need to use GitHub (version2) and set up a connection. You can read about how to do it here. After the connection is set up, select your repository and the branch you want to deploy from. We also want to start the pipeline if the source code changes. For the sake of simplicity, we want to have the Output artefact format as CodePipeline default. At the Build stage, we select AWS CodeBuild as the build provider and let's select the build that we created above. Remember that we have the ENVIRONMENT_TARGET as a variable used in our build, so let's add it to this stage with the Plaintext value prod. This way the build will run the build:prod command from our package.json. As the Build type we want Single build. We can skip the deployment stage because we are going to set up deployment in our build job. Review our build pipeline and create it. After it is created, it will run for the first time. At this time it will not deploy anything but it should run successfully. Deployment prerequisites To be able to deploy to S3 and Elastic Beanstalk, we need our CodeBuild job to be able to interact with those services. When we created the build, we created a service role for it. In this example, the service role is codebuild-aws-test-build-and-deploy-service-role. Let's go to the IAM page in the console and open the Roles page. Search for our codebuild role and let's add permissions to it. Click the Add permissions button and select Attach policies. We need two AWS-managed policies to be added to this service role. The AdministratorAccess-AWSElasticBeanstalk will allow us to deploy the API and the AmazonS3FullAccess will allow us to deploy the front-end. The CloudFrontFullAccess will allow us to invalidate the caches so CloudFront will send the new front-end files after the deployment is ready. Deployment Upload the front-end to S3 Uploading the front-end should be pretty straightforward. We use an AWS CodeBuild managed image in our pipeline, therefore, we have access to the aws command. Let's update our buildspec file with the following changes: ` First, we upload the fresh front-end build to the S3 bucket, and then we invalidate the caches for the index.html file, so CloudFront will immediately serve the changes. If you have more static files in your app, you might need to invalidate caches for those as well. Before we push the above changes up, we need to update the environment variables in our CodePipeline. To do this open the pipeline and click on the Edit button. This will then enable us to edit the Build stage. Edit the build step by clicking on the edit button. On this screen, we add the new environment variables. For this example, it is aws-hosting-prod as Plaintext for the FRONT_END_BUCKET and E3FV1Q1P98H4EZ as Plaintext for the CLOUDFRONT_DISTRIBUTION_ID Now if we add changes to our index.html file, for example, change the button to HELLO 2, commit it and push it. It gets deployed. Deploying the API to Elastic Beanstalk We are going to need some environment variables passed down to the build pipeline to be able to deploy to different environments, like staging or prod. We gathered these below: - COMMIT_ID: #{SourceVariables.CommitId} - This will have the commit id from the checkout step. We include this, so we can always check what commit is deployed. - ELASTIC_BEANSTALK_APPLICATION_NAME: Test AWS App - This is the Elastic Beanstalk app which has your environment associated. - ELASTIC_BEANSTALK_ENVIRONMENT_NAME: TestAWSApp-prod - This is the Elastic Beanstalk environment you want to deploy to - API_VERSION_BUCKET: elasticbeanstalk-us-east-1-474671518642 - This is the S3 bucket that was created by Elastic Beanstalk With the above variables, we can make some new variables during the build time, so we can make sure that every API version is unique and gets deployed. We set this up in the install phase. ` The APP_VERSION variable is the version property from the package.json file. In a release process, the application's version is stored here. The API_VERSION variable will contain the APP_VERSION and as a suffix, we include the build number. We want to upload this API version by indicating the commit ID, so the API_ZIP_KEY will have this information. The APP_VERSION_DESCRIPTION will be the description of the deployed version in Elastic Beanstalk. Finally, we are going to update the buildspec file with the actual Elastic Beanstalk deployment steps. ` Let's make a change in the API, for example, the message sent back by the /api/hello endpoint and push up the changes. --- Now every time a change is merged to the main branch, it gets pushed to our production deployment. Using these guides, you can set up multiple environments, and you can configure separate CodePipeline instances to deploy from different branches. I hope this guide proved to be helpful to you....

How to host a full-stack app with AWS CloudFront and Elastic Beanstalk cover image

How to host a full-stack app with AWS CloudFront and Elastic Beanstalk

How to host a full-stack JavaScript app with AWS CloudFront and Elastic Beanstalk Let's imagine that you have finished building your app. You have a Single Page Application (SPA) with a NestJS back-end. You are ready to launch, but what if your app is a hit, and you need to be prepared to serve thousands of users? You might need to scale your API horizontally, which means that to serve traffic, you need to have more instances running behind a load balancer. Serving your front-end using a CDN will also be helpful. In this article, I am going to give you steps on how to set up a scalable distribution in AWS, using S3, CloudFront and Elastic Beanstalk. The NestJS API and the simple front-end are both inside an NX monorepo The sample application For the sake of this tutorial, we have put together a very simple HTML page that tries to reach an API endpoint and a very basic API written in NestJS. The UI The UI code is very simple. There is a "HELLO" button on the UI which when clicked, tries to reach out to the /api/hello endpoint. If there is a response with status code 2xx, it puts an h1 tag with the response contents into the div with the id result. If it errors out, it puts an error message into the same div. ` The API We bootstrap the NestJS app to have the api prefix before every endpoint call. ` We bootstrap it with the AppModule which only has the AppController in it. ` And the AppController sets up two very basic endpoints. We set up a health check on the /api route and our hello endpoint on the /api/hello route. ` Hosting the front-end with S3 and CloudFront To serve the front-end through a CMS, we should first create an S3 bucket. Go to S3 in your AWS account and create a new bucket. Name your new bucket to something meaningful. For example, if this is going to be your production deployment I recommend having -prod in the name so you will be able to see at a glance, that this bucket contains your production front-end and nothing should get deleted accidentally. We go with the defaults for this bucket setting it to the us-east-1 region. Let's set up the bucket to block all public access, because we are going to allow get requests through CloudFront to these files. We don't need bucket versioning enabled, because these files will be deleted every time a new front-end version will be uploaded to this bucket. If we were to enable bucket versioning, old front-end files would be marked as deleted and kept, increasing the storage costs in the long run. Let's use server-side encryption with Amazon S3-managed keys and create the bucket. When the bucket is created, upload the front-end files to the bucket and let's go to the CloudFront service and create a distribution. As the origin domain, choose your S3 bucket. Feel free to change the name for the origin. For Origin access, choose the Origin access control settings (recommended). Create a new Control setting with the defaults. I recommend adding a description to describe this control setting. At the Web Application Firewall (WAF) settings we would recommend enabling security protections, although it has cost implications. For this tutorial, we chose not to enable WAF for this CloudFront distribution. In the Settings section, please choose the Price class that best fits you. If you have a domain and an SSL certificate you can set those up for this distribution, but you can do that later as well. As the Default root object, please provide index.html and create the distribution. When you have created the distribution, you should see a warning at the top of the page. Copy the policy and go to your S3 bucket's Permissions tab. Edit the Bucket policy and paste the policy you just copied, then save it. If you have set up a domain with your CloudFront distribution, you can open that domain and you should be able to see our front-end deployed. If you didn't set up a domain the Details section of your CloudFront distribution contains your distribution domain name. If you click on the "Hello" button on your deployed front-end, it should not be able to reach the /api/hello endpoint and should display an error message on the page. Hosting the API in Elastic Beanstalk Elastic beanstalk prerequisites For our NestJS API to run in Elastic Beanstalk, we need some additional setup. Inside the apps/api/src folder, let's create a Procfile with the contents: web: node main.js. Then open the apps/api/project.json and under the build configuration, extend the production build setup with the following (I only ) ` The above settings will make sure that when we build the API with a production configuration, it will generate a package.json and a package-lock.json near the output file main.js. To have a production-ready API, we set up a script in the package.json file of the repository. Running this will create a dist/apps/api and a dist/apps/frontend folder with the necessary files. ` After running the script, zip the production-ready api folder so we can upload it to Elastic Beanstalk later. ` Creating the Elastic Beanstalk Environment Let's open the Elastic Beanstalk service in the AWS console. And create an application. An application is a logical grouping of several environments. We usually put our development, staging and production environments under the same application name. The first time you are going to create an application you will need to create an environment as well. We are creating a Web server environment. Provide your application's name in the Application information section. You could also provide some unique tags for your convenience. In the Environment information section please provide information on your environment. Leave the Domain field blank for an autogenerated value. When setting up the platform, we are going to use the Managed Node.js platform with version 18 and with the latest platform version. Let's upload our application code, and name the version to indicate that it was built locally. This version label will be displayed on the running environment and when we set up automatic deployments we can validate if the build was successful. As a Preset, let's choose Single instance (free tier eligible) On the next screen configure your service access. For this tutorial, we only create a new service-role. You must select the aws-elasticbeanstalk-ec2-role for the EC2 instance profile. If can't select this role, you should create it in AWS IAM with the AWSElasticBeanstalkWebTier, AWSElasticBeanstalkMulticontainerDocker and the AWSElasticBeanstalkRoleWorkerTier managed permissions. The next step is to set up the VPC. For this tutorial, I chose the default VPC that is already present with my AWS account, but you can create your own VPC and customise it. In the Instance settings section, we want our API to have a public IP address, so it can be reached from the internet, and we can route to it from CloudFront. Select all the instance subnets and availability zones you want to have for your APIs. For now, we are not going to set up a database. We can set it up later in AWS RDS but in this tutorial, we would like to focus on setting up the distribution. Let's move forward Let's configure the instance traffic and scaling. This is where we are going to set up the load balancer. In this tutorial, we are keeping to the defaults, therefore, we add the EC2 instances to the default security group. In the Capacity section we set the Environment type to Load balanced. This will bring up a load balancer for this environment. Let's set it up so that if the traffic is large, AWS can spin up two other instances for us. Please select your preferred tier in the instance types section, We only set this to t3.micro For this tutorial, but you might need to use larger tiers. Configure the Scaling triggers to your needs, we are going to leave them as defaults. Set the load balancer's visibility to the public and use the same subnets that you have used before. At the Load Balancer Type section, choose Application load balancer and select Dedicated for exactly this environment. Let's set up the listeners, to support HTTPS. Add a new listener for the 443 port and connect your SSL certificate that you have set up in CloudFront as well. For the SSL policy choose something that is over TLS 1.2 and connect this port to the default process. Now let's update the default process and set up the health check endpoint. We set up our API to have the health check endpoint at the /api route. Let's modify the default process accordingly and set its port to 8080. For this tutorial, we decided not to enable log file access, but if you need it, please set it up with a separate S3 bucket. At the last step of configuring your Elastic Beanstalk environment, please set up Monitoring, CloudWatch logs and Managed platform updates to your needs. For the sake of this tutorial, we have turned most of these options off. Set up e-mail notifications to your dedicated alert e-mail and select how you would like to do your application deployments. At the end, let's configure the Environment properties. We have set the default process to occupy port 8080, therefore, we need to set up the PORT environment variable to 8080. Review your configuration and then create your environment. It might take a few minutes to set everything up. After the environment's health transitions to OK you can go to AWS EC2 / Load balancers in your web console. If you select the freshly created load balancer, you can copy the DNS name and test if it works by appending /api/hello at the end of it. Connect CloudFront to the API endpoint Let's go back to our CloudFront distribution and select the Origins tab, then create a new origin. Copy your load balancer's URL into the Origin domain field and select HTTPS only protocol if you have set up your SSL certificate previously. If you don't have an SSL certificate set up, you might use HTTP only, but please know that it is not secure and it is especially not recommended in production. We also renamed this origin to API. Leave everything else as default and create a new origin. Under the Behaviors tab, create a new behavior. Set up the path pattern as /api/* and select your newly created API origin. At the Viewer protocol policy select Redirect HTTP to HTTPS and allow all HTTP methods (GET, HEAD, OPTIONS, PUT, POST, PATCH, DELETE). For this tutorial, we have left everything else as default, but please select the Cache Policy and Origin request policy that suits you the best. Now if you visit your deployment, when you click on the HELLO button, it should no longer attach an error message to the DOM. --- Now we have a distribution that serves the front-end static files through CloudFront, leveraging caching and CDN, and we have our API behind a load balancer that can scale. But how do we deploy our front-end and back-end automatically when a release is merged to our main branch? For that we are going to leverage AWS CodeBuild and CodePipeline, but in the next blog post. Stay tuned....

The 2025 Guide to JS Build Tools cover image

The 2025 Guide to JS Build Tools

The 2025 Guide to JS Build Tools In 2025, we're seeing the largest number of JavaScript build tools being actively maintained and used in history. Over the past few years, we've seen the trend of many build tools being rewritten or forked to use a faster and more efficient language like Rust and Go. In the last year, new companies have emerged, even with venture capital funding, with the goal of working on specific sets of build tools. Void Zero is one such recent example. With so many build tools around, it can be difficult to get your head around and understand which one is for what. Hopefully, with this blog post, things will become a bit clearer. But first, let's explain some concepts. Concepts When it comes to build tools, there is no one-size-fits-all solution. Each tool typically focuses on one or two primary features, and often relies on other tools as dependencies to accomplish more. While it might be difficult to explain here all of the possible functionalities a build tool might have, we've attempted to explain some of the most common ones so that you can easily understand how tools compare. Minification The concept of minification has been in the JavaScript ecosystem for a long time, and not without reason. JavaScript is typically delivered from the server to the user's browser through a network whose speed can vary. Thus, there was a need very early in the web development era to compress the source code as much as possible while still making it executable by the browser. This is done through the process of *minification*, which removes unnecessary whitespace, comments, and uses shorter variable names, reducing the total size of the file. This is what an unminified JavaScript looks like: ` This is the same file, minified: ` Closely related to minimizing is the concept of source maps#Source_mapping), which goes hand in hand with minimizing - source maps are essentially mappings between the minified file and the original source code. Why is that needed? Well, primarily for debugging minified code. Without source maps, understanding errors in minified code is nearly impossible because variable names are shortened, and all formatting is removed. With source maps, browser developer tools can help you debug minified code. Tree-Shaking *Tree-shaking* was the next-level upgrade from minification that became possible when ES modules were introduced into the JavaScript language. While a minified file is smaller than the original source code, it can still get quite large for larger apps, especially if it contains parts that are effectively not used. Tree shaking helps eliminate this by performing a static analysis of all your code, building a dependency graph of the modules and how they relate to each other, which allows the bundler to determine which exports are used and which are not. Once unused exports are found, the build tool will remove them entirely. This is also called *dead code elimination*. Bundling Development in JavaScript and TypeScript rarely involves a single file. Typically, we're talking about tens or hundreds of files, each containing a specific part of the application. If we were to deliver all those files to the browser, we would overwhelm both the browser and the network with many small requests. *Bundling* is the process of combining multiple JS/TS files (and often other assets like CSS, images, etc.) into one or more larger files. A bundler will typically start with an entry file and then recursively include every module or file that the entry file depends on, before outputting one or more files containing all the necessary code to deliver to the browser. As you might expect, a bundler will typically also involve minification and tree-shaking, as explained previously, in the process to deliver only the minimum amount of code necessary for the app to function. Transpiling Once TypeScript arrived on the scene, it became necessary to translate it to JavaScript, as browsers did not natively understand TypeScript. Generally speaking, the purpose of a *transpiler* is to transform one language into another. In the JavaScript ecosystem, it's most often used to transpile TypeScript code to JavaScript, optionally targeting a specific version of JavaScript that's supported by older browsers. However, it can also be used to transpile newer JavaScript to older versions. For example, arrow functions, which are specified in ES6, are converted into regular function declarations if the target language is ES5. Additionally, a transpiler can also be used by modern frameworks such as React to transpile JSX syntax (used in React) into plain JavaScript. Typically, with transpilers, the goal is to maintain similar abstractions in the target code. For example, transpiling TypeScript into JavaScript might preserve constructs like loops, conditionals, or function declarations that look natural in both languages. Compiling While a transpiler's purpose is to transform from one language to another without or with little optimization, the purpose of a *compiler* is to perform more extensive transformations and optimizations, or translate code from a high-level programming language into a lower-level one such as bytecode. The focus here is on optimizing for performance or resource efficiency. Unlike transpiling, compiling will often transform abstractions so that they suit the low-level representation, which can then run faster. Hot-Module Reloading (HMR) *Hot-module reloading* (HMR) is an important feature of modern build tools that drastically improves the developer experience while developing apps. In the early days of the web, whenever you'd make a change in your source code, you would need to hit that refresh button on the browser to see the change. This would become quite tedious over time, especially because with a full-page reload, you lose all the application state, such as the state of form inputs or other UI components. With HMR, we can update modules in real-time without requiring a full-page reload, speeding up the feedback loop for any changes made by developers. Not only that, but the full application state is typically preserved, making it easier to test and iterate on code. Development Server When developing web applications, you need to have a locally running development server set up on something like http://localhost:3000. A development server typically serves unminified code to the browser, allowing you to easily debug your application. Additionally, a development server will typically have hot module replacement (HMR) so that you can see the results on the browser as you are developing your application. The Tools Now that you understand the most important features of build tools, let's take a closer look at some of the popular tools available. This is by no means a complete list, as there have been many build tools in the past that were effective and popular at the time. However, here we will focus on those used by the current popular frameworks. In the table below, you can see an overview of all the tools we'll cover, along with the features they primarily focus on and those they support secondarily or through plugins. The tools are presented in alphabetical order below. Babel Babel, which celebrated its 10th anniversary since its initial release last year, is primarily a JavaScript transpiler used to convert modern JavaScript (ES6+) into backward-compatible JavaScript code that can run on older JavaScript engines. Traditionally, developers have used it to take advantage of the newer features of the JavaScript language without worrying about whether their code would run on older browsers. esbuild esbuild, created by Evan Wallace, the co-founder and former CTO of Figma, is primarily a bundler that advertises itself as being one of the fastest bundlers in the market. Unlike all the other tools on this list, esbuild is written in Go. When it was first released, it was unusual for a JavaScript bundler to be written in a language other than JavaScript. However, this choice has provided significant performance benefits. esbuild supports ESM and CommonJS modules, as well as CSS, TypeScript, and JSX. Unlike traditional bundlers, esbuild creates a separate bundle for each entry point file. Nowadays, it is used by tools like Vite and frameworks such as Angular. Metro Unlike other build tools mentioned here, which are mostly web-focused, Metro's primary focus is React Native. It has been specifically optimized for bundling, transforming, and serving JavaScript and assets for React Native apps. Internally, it utilizes Babel as part of its transformation process. Metro is sponsored by Meta and actively maintained by the Meta team. Oxc The JavaScript Oxidation Compiler, or Oxc, is a collection of Rust-based tools. Although it is referred to as a compiler, it is essentially a toolchain that includes a parser, linter, formatter, transpiler, minifier, and resolver. Oxc is sponsored by Void Zero and is set to become the backbone of other Void Zero tools, like Vite. Parcel Feature-wise, Parcel covers a lot of ground (no pun intended). Largely created by Devon Govett, it is designed as a zero-configuration build tool that supports bundling, minification, tree-shaking, transpiling, compiling, HMR, and a development server. It can utilize all the necessary types of assets you will need, from JavaScript to HTML, CSS, and images. The core part of it is mostly written in JavaScript, with a CSS transformer written in Rust, whereas it delegates the JavaScript compilation to a SWC. Likewise, it also has a large collection of community-maintained plugins. Overall, it is a good tool for quick development without requiring extensive configuration. Rolldown Rolldown is the future bundler for Vite, written in Rust and built on top of Oxc, currently leveraging its parser and resolver. Inspired by Rollup (hence the name), it will provide Rollup-compatible APIs and plugin interface, but it will be more similar to esbuild in scope. Currently, it is still in heavy development and it is not ready for production, but we should definitely be hearing more about this bundler in 2025 and beyond. Rollup Rollup is the current bundler for Vite. Originally created by Rich Harris, the creator of Svelte, Rollup is slowly becoming a veteran (speaking in JavaScript years) compared to other build tools here. When it originally launched, it introduced novel ideas focused on ES modules and tree-shaking, at the time when Webpack as its competitor was becoming too complex due to its extensive feature set - Rollup promised a simpler way with a straightforward configuration process that is easy to understand. Rolldown, mentioned previously, is hoped to become a replacement for Rollup at some point. Rsbuild Rsbuild is a high-performance build tool written in Rust and built on top of Rspack. Feature-wise, it has many similiarities with Vite. Both Rsbuild and Rspack are sponsored by the Web Infrastructure Team at ByteDance, which is a division of ByteDance, the parent company of TikTok. Rsbuild is built as a high-level tool on top of Rspack that has many additional features that Rspack itself doesn't provide, such as a better development server, image compression, and type checking. Rspack Rspack, as the name suggests, is a Rust-based alternative to Webpack. It offers a Webpack-compatible API, which is helpful if you are familiar with setting up Webpack configurations. However, if you are not, it might have a steep learning curve. To address this, the same team that built Rspack also developed Rsbuild, which helps you achieve a lot with out-of-the-box configuration. Under the hood, Rspack uses SWC for compiling and transpiling. Feature-wise, it’s quite robust. It includes built-in support for TypeScript, JSX, Sass, Less, CSS modules, Wasm, and more, as well as features like module federation, PostCSS, Lightning CSS, and others. Snowpack Snowpack was created around the same time as Vite, with both aiming to address similar needs in modern web development. Their primary focus was on faster build times and leveraging ES modules. Both Snowpack and Vite introduced a novel idea at the time: instead of bundling files while running a local development server, like traditional bundlers, they served the app unbundled. Each file was built only once and then cached indefinitely. When a file changed, only that specific file was rebuilt. For production builds, Snowpack relied on external bundlers such as Webpack, Rollup, or esbuild. Unfortunately, Snowpack is a tool you’re likely to hear less and less about in the future. It is no longer actively developed, and Vite has become the recommended alternative. SWC SWC, which stands for Speedy Web Compiler, can be used for both compilation and bundling (with the help of SWCpack), although compilation is its primary feature. And it really is speedy, thanks to being written in Rust, as are many other tools on this list. Primarily advertised as an alternative to Babel, its SWC is roughly 20x faster than Babel on a single thread. SWC compiles TypeScript to JavaScript, JSX to JavaScript, and more. It is used by tools such as Parcel and Rspack and by frameworks such as Next.js, which are used for transpiling and minification. SWCpack is the bundling part of SWC. However, active development within the SWC ecosystem is not currently a priority. The main author of SWC now works for Turbopack by Vercel, and the documentation states that SWCpack is presently not in active development. Terser Terser has the smallest scope compared to other tools from this list, but considering that it's used in many of those tools, it's worth separating it into its own section. Terser's primary role is minification. It is the successor to the older UglifyJS, but with better performance and ES6+ support. Vite Vite is a somewhat of a special beast. It's primarily a development server, but calling it just that would be an understatement, as it combines the features of a fast development server with modern build capabilities. Vite shines in different ways depending on how it's used. During development, it provides a fast server that doesn't bundle code like traditional bundlers (e.g., Webpack). Instead, it uses native ES modules, serving them directly to the browser. Since the code isn't bundled, Vite also delivers fast HMR, so any updates you make are nearly instant. Vite uses two bundlers under the hood. During development, it uses esbuild, which also allows it to act as a TypeScript transpiler. For each file you work on, it creates a file for the browser, allowing an easy separation between files which helps HMR. For production, it uses Rollup, which generates a single file for the browser. However, Rollup is not as fast as esbuild, so production builds can be a bit slower than you might expect. (This is why Rollup is being rewritten in Rust as Rolldown. Once complete, you'll have the same bundler for both development and production.) Traditionally, Vite has been used for client-side apps, but with the new Environment API released in Vite 6.0, it bridges the gap between client-side and server-rendered apps. Turbopack Turbopack is a bundler, written in Rust by the creators of webpack and Next.js at Vercel. The idea behind Turbopack was to do a complete rewrite of Webpack from scratch and try to keep a Webpack compatible API as much as possible. This is not an easy feat, and this task is still not over. The enormous popularity of Next.js is also helping Turbopack gain traction in the developer community. Right now, Turbopack is being used as an opt-in feature in Next.js's dev server. Production builds are not yet supported but are planned for future releases. Webpack And finally we arrive at Webpack, the legend among bundlers which has had a dominant position as the primary bundler for a long time. Despite the fact that there are so many alternatives to Webpack now (as we've seen in this blog post), it is still widely used, and some modern frameworks such as Next.js still have it as a default bundler. Initially released back in 2012, its development is still going strong. Its primary features are bundling, code splitting, and HMR, but other features are available as well thanks to its popular plugin system. Configuring Webpack has traditionally been challenging, and since it's written in JavaScript rather than a lower-level language like Rust, its performance lags behind compared to newer tools. As a result, many developers are gradually moving away from it. Conclusion With so many build tools in today's JavaScript ecosystem, many of which are similarly named, it's easy to get lost. Hopefully, this blog post was a useful overview of the tools that are most likely to continue being relevant in 2025. Although, with the speed of development, it may as well be that we will be seeing a completely different picture in 2026!...

The simplicity of deploying an MCP server on Vercel cover image

The simplicity of deploying an MCP server on Vercel

The current Model Context Protocol (MCP) spec is shifting developers toward lightweight, stateless servers that serve as tool providers for LLM agents. These MCP servers communicate over HTTP, with OAuth handled clientside. Vercel’s infrastructure makes it easy to iterate quickly and ship agentic AI tools without overhead. Example of Lightweight MCP Server Design At This Dot Labs, we built an MCP server that leverages the DocuSign Navigator API. The tools, like `get_agreements`, make a request to the DocuSign API to fetch data and then respond in an LLM-friendly way. ` Before the MCP can request anything, it needs to guide the client on how to kick off OAuth. This involves providing some MCP spec metadata API endpoints that include necessary information about where to obtain authorization tokens and what resources it can access. By understanding these details, the client can seamlessly initiate the OAuth process, ensuring secure and efficient data access. The Oauth flow begins when the user's LLM client makes a request without a valid auth token. In this case they’ll get a 401 response from our server with a WWW-Authenticate header, and then the client will leverage the metadata we exposed to discover the authorization server. Next, the OAuth flow kicks off directly with Docusign as directed by the metadata. Once the client has the token, it passes it in the Authorization header for tool requests to the API. ` This minimal set of API routes enables me to fetch Docusign Navigator data using natural language in my agent chat interface. Deployment Options I deployed this MCP server two different ways: as a Fastify backend and then by Vercel functions. Seeing how simple my Fastify MCP server was, and not really having a plan for deployment yet, I was eager to rewrite it for Vercel. The case for Vercel: * My own familiarity with Next.js API deployment * Fit for architecture * The extremely simple deployment process * Deploy previews (the eternal Vercel customer conversion feature, IMO) Previews of unfamiliar territory Did you know that the MCP spec doesn’t “just work” for use as ChatGPT tooling? Neither did I, and I had to experiment to prove out requirements that I was unfamiliar with. Part of moving fast for me was just deploying Vercel previews right out of the CLI so I could test my API as a Connector in ChatGPT. This was a great workflow for me, and invaluable for the team in code review. Stuff I’m Not Worried About Vercel’s mcp-handler package made setup effortless by abstracting away some of the complexity of implementing the MCP server. It gives you a drop-in way to define tools, setup https-streaming, and handle Oauth. By building on Vercel’s ecosystem, I can focus entirely on shipping my product without worrying about deployment, scaling, or server management. Everything just works. ` A Brief Case for MCP on Next.js Building an API without Next.js on Vercel is straightforward. Though, I’d be happy deploying this as a Next.js app, with the frontend features serving as the documentation, or the tools being a part of your website's agentic capabilities. Overall, this lowers the barrier to building any MCP you want for yourself, and I think that’s cool. Conclusion I'll avoid quoting Vercel documentation in this post. AI tooling is a critical component of this natural language UI, and we just want to ship. I declare Vercel is excellent for stateless MCP servers served over http....

Let's innovate together!

We're ready to be your trusted technical partners in your digital innovation journey.

Whether it's modernization or custom software solutions, our team of experts can guide you through best practices and how to build scalable, performant software that lasts.

Prefer email? hi@thisdot.co