Interested in learning how to use Tensorflow to detect hand sign languages in your apps? By the end of this read, you will know how to implement Tensorflow in your application with very simple steps. In our example today, we will be using Vue.
What is Tensorflow?
Tensorflow is an end-to-end platform (meaning: delivering complex systems or services in functional form after developing it from beginning to end.) used for building Machine Learning applications, and it is also open-source. TensorFlow enables you to build dataflow graphs and structures to define how data moves through a graph by taking inputs as a multi-dimensional array called Tensor. You can read more on Tensorflow here.
What is a Model?
A model is a function with learnable parameters that maps an input to an output. A well-trained model will provide an accurate mapping from the input to the desired output.
Tensorflow Models
Tensorflow models are pre-trained models, and there are four defined categories of them:
- Vision: Analyze features in images and videos.
- Body: Detect key points and poses on the face, hands, and body with models from MediPipe
- Text: Enable NLP in your web app using the power of BERT and other Transformer encoder architectures.
- Audio: Classify audio to detect sounds.
If you want to go into more detail, check out Tensorflow Models.
All these models are broken down into subs and for our case, we will be making use of the Body Model which has the hand pose detection we need in order to detect the hand signs.
Hand Pose Detection
This model used a 2D and 3D multi-dimensional array which enables it to predict the keypoints of the hands.
Example of a 2D is [[1,2],[3,5],[7,8],[20,44]] and that of a 3D is [[1,2,5],[3,5,8],[7,8,6],[20,44,100]].
This hand pose detection is a model from the MediPipe as we established above, and it provides us with two model types which are lite and full. The accuracy of the prediction increases from lite to full while the inference speed reduces, i.e. the response time will be slower as the accuracy increases.
What do we need?
There are a few dependencies we need to get things working, and I also will be assuming that you have your project set up as well.
You will need to add these dependencies to the project
yarn add @tensorflow-models/hand-pose-detection

# Run the below commands if you want to use TF.js runtime.
yarn add @tensorflow/tfjs-core @tensorflow/tfjs-converter
yarn add @tensorflow/tfjs-backend-webgl

# Run the below commands if you want to use MediaPipe runtime.
yarn add @mediapipe/hands

yarn add fingerpose
Above, in the commands, you will notice we added a fingerpose. Let's talk a little about what we need the figerpose for.
Fingerpose
Fingerpose is a gesture classifier for hand landmarks detected by Mediapipe hand pose detection. It also allows you to add your own hand gesture, which means that a gesture that signifies the letter Z can signify Hello based on your fingerpose data. We will see an example of how the data looks in a bit. You can check out fingerpose for more details.
Get started
We are going to use Vue for this illustration. We will start by looking at the HTML first, and then we will cover the JavaScript.
Our Template will be a basic HTML that will have a video tag so we can show a video after getting access to our webcam.
Template
<template>
  <div class="wrapper">
    <video
      ref="videoCam"
      class="peer-video"
      preload="auto"
      autoPlay
      muted
      playsInline
    />
  </div>
</template>
The snippet above shows a div and a video tab. The video is used when we gain access to the webcam.
We will now be writing the JS required to initialize the webcam.
Script
<script  setup>
import { onMounted, ref } from "vue";

const videoCam = ref();
function openCam() {
  let all_mediaDevices = navigator.mediaDevices;

  if (!all_mediaDevices || !all_mediaDevices.getUserMedia) {
    console.log("getUserMedia() not supported.");
    return;
  }
  all_mediaDevices.getUserMedia({
    audio: true,
    video: true,

  })
    .then(function (vidStream) {
      if ("srcObject" in videoCam.value) {
        videoCam.value.srcObject = vidStream;
      } else {
        videoCam.value.src = window.URL.createObjectURL(vidStream);
      }
      videoCam.value.onloadedmetadata = function () {
        videoCam.value.play();
      };
    })
    .catch(function (e) {
      console.log(e.name + ": " + e.message);
    });
}
onMounted(() => {
  openCam();
});
</script>
We imported two methods from vue: onMounted and ref. The onMounted runs when the page is fully mounted while the ref is used to declare a reactive value to reference the video element. If you look at the video tag in the template, you will notice a ref property. You can check out Template ref and onMounted lifecycle hook.
In the openCam function, we first try to test if mediaDevices is available on your browser navigation.
The MediaDevices interface provides access to connected media input devices like cameras and microphones, as well as screen sharing. In essence, it lets you obtain access to any hardware source of media data.
This MediaDevice has a method getUserMedia which prompts the user for permission to use a media input. You can find all you need to know about getUserMedia here.
From the snippet, we can see that getUserMedia returns a promise, and with that, we can get the media stream as a response using then(). We check if the video element has srcObject or not. If it does we assign the media stream to the srcObject and if not, we convert the media stream to a URL and assign it to the src of the video element.
With this Snippet and with a few style, you should have your video showing your awesome face!
Introducing Tensorflow and Hand Detection
Now that we got our webcam working, we will update the Template and the script in order to detect, predict, and display the alphabet based on the hand sign prediction.
The updated HTML should now look like this:
<template>
  <div class="wrapper">
    <video
      ref="videoCam"
      class="peer-video"
      preload="auto"
      autoPlay
      muted
      playsInline
    />
    <div class="alphabet">{{ sign }}</div>
  </div>
</template>
The div with class name alphabet will display the alphabet based on the hand sign prediction.
We will be introducing two(2) new functions, createDetectionInstance and handleSignDetection.
Firstly, lets begin with the createDetectionInstance which is an integral part of the hand sign detection and then we will introduce handleSignDetection which predicts and displays the hand sign.
<script setup>
import { onMounted, ref } from "vue";
import * as handPoseDetection from "@tensorflow-models/hand-pose-detection";

let detector;
const videoCam = ref();

function openCam() {
   …
}

const createDetectionInstance = async () => {
  const model = handPoseDetection.SupportedModels.MediaPipeHands;
  const detectorConfig = {
    runtime: "mediapipe",
    modelType: "lite",
    solutionPath: "https://cdn.jsdelivr.net/npm/@mediapipe/hands/",
  } as const;
  detector = await handPoseDetection.createDetector(model, detectorConfig);
};

onMounted(async () => {
  openCam();
  await createDetectionInstance();
});
</script>
To be able to detect hand poses, we need to create an instance of the handpose detector, and here, we created a function createDetectionInstance which is an asynchronous function.
You can check out this Tensorflow blog to see more details.
Now that we have created an avenue to detect hand signs, let us start detecting the hand.
In that light, we will be adding a handleSignDetection function.
<script setup>
import { onMounted, ref } from "vue";
import * as handPoseDetection from "@tensorflow-models/hand-pose-detection";

let detector;
const videoCam = ref();

function openCam() {
  …
}

const createDetectionInstance = async () => {
  const model = handPoseDetection.SupportedModels.MediaPipeHands;
  const detectorConfig = {
    runtime: "mediapipe",
    modelType: "lite",
    solutionPath: "https://cdn.jsdelivr.net/npm/@mediapipe/hands/",
  } as const;
  detector = await handPoseDetection.createDetector(model, detectorConfig);
};

const handleSignDetection = () => {
  if (!videoCam.value || !detector) return;
  setInterval(async () => {
    const hands = await detector.estimateHands(videoCam.value);
    if (hands.length > 0) {
      console.log(hands)
    }
  }, 2000);
};
onMounted(async () => {
  openCam();
  await createDetectionInstance();
  handleSignDetection();
});
</script>
The handleSignDetection runs after creating the detection instance. We have a setInterval that runs every 2 seconds (PS: the 2 seconds timing is arbitrary and can be less or more) to check if there is any hand sign. We also have a conditional statement to ensure the video element exists, and the detection instance was created accordingly.
So, the detector calls a method estimateHands, which tries to predict the hand pose by getting keypoints with values that are either in 2D or 3D (Multi-dimensional Array).
If you check your console log, you will see an array of data if any hand pose is detected.
Now that we can detect hand poses, we will now add fingerpose that will help predict and display the alphabet based on the hand sign.
<script setup>
import { onMounted, ref } from "vue";
import * as handPoseDetection from "@tensorflow-models/hand-pose-detection";
import * as fp from "fingerpose";
import Handsigns from "@/utils/handsigns";

let detector;
const videoCam = ref();
let sign = ref(null);

function openCam() {
  …
}

const createDetectionInstance = async () => {
  const model = handPoseDetection.SupportedModels.MediaPipeHands;
  const detectorConfig = {
    runtime: "mediapipe",
    modelType: "lite",
    solutionPath: "https://cdn.jsdelivr.net/npm/@mediapipe/hands/",
  } as const;
  detector = await handPoseDetection.createDetector(model, detectorConfig);
};

const handleSignDetection = () => {
  if (!videoCam.value || !detector) return;
  setInterval(async () => {
    const hands = await detector.estimateHands(videoCam.value);
    if (hands.length > 0) {
      const GE = new fp.GestureEstimator([
        fp.Gestures.ThumbsUpGesture,
        Handsigns.aSign,
        Handsigns.bSign,
        Handsigns.cSign,
        …
        Handsigns.zSign,
      ]);

      const landmark = hands[0].keypoints3D.map(
        (value) => [
          value.x,
          value.y,
          value.z,
        ]
      );
      const estimatedGestures = await GE.estimate(landmark, 6.5);

      if (estimatedGestures.gestures && estimatedGestures.gestures.length > 0) {
        const confidence = estimatedGestures.gestures.map((p) => p.score);
        const maxConfidence = confidence.indexOf(
          Math.max.apply(undefined, confidence)
        );

        sign.value = estimatedGestures.gestures[maxConfidence].name
      }
    }
  }, 2000);
};
onMounted(async () => {
  openCam();
  await createDetectionInstance();
  handleSignDetection();
});
</script>
Assuming that our detector sensed a hand, it is time to match this value based on the hand signs we created with the fingerpose.
The landmark variable is a 3D array pulled from the hand result's keypoint3D key value. There is also a keypoint as well, which is a 2D value, and both will give the same result.
Now, using GE.estimate, we can generate a possible gesture that matches the sign, and a score/confidence is assigned to each gesture pending the amount of gesture predicted. So, the gesture with the highest score/confidence is selected since it is estimated to be the closest to the hand sign from the figerpose hand signs we created.
We also imported Handsigns and its content looks like this:
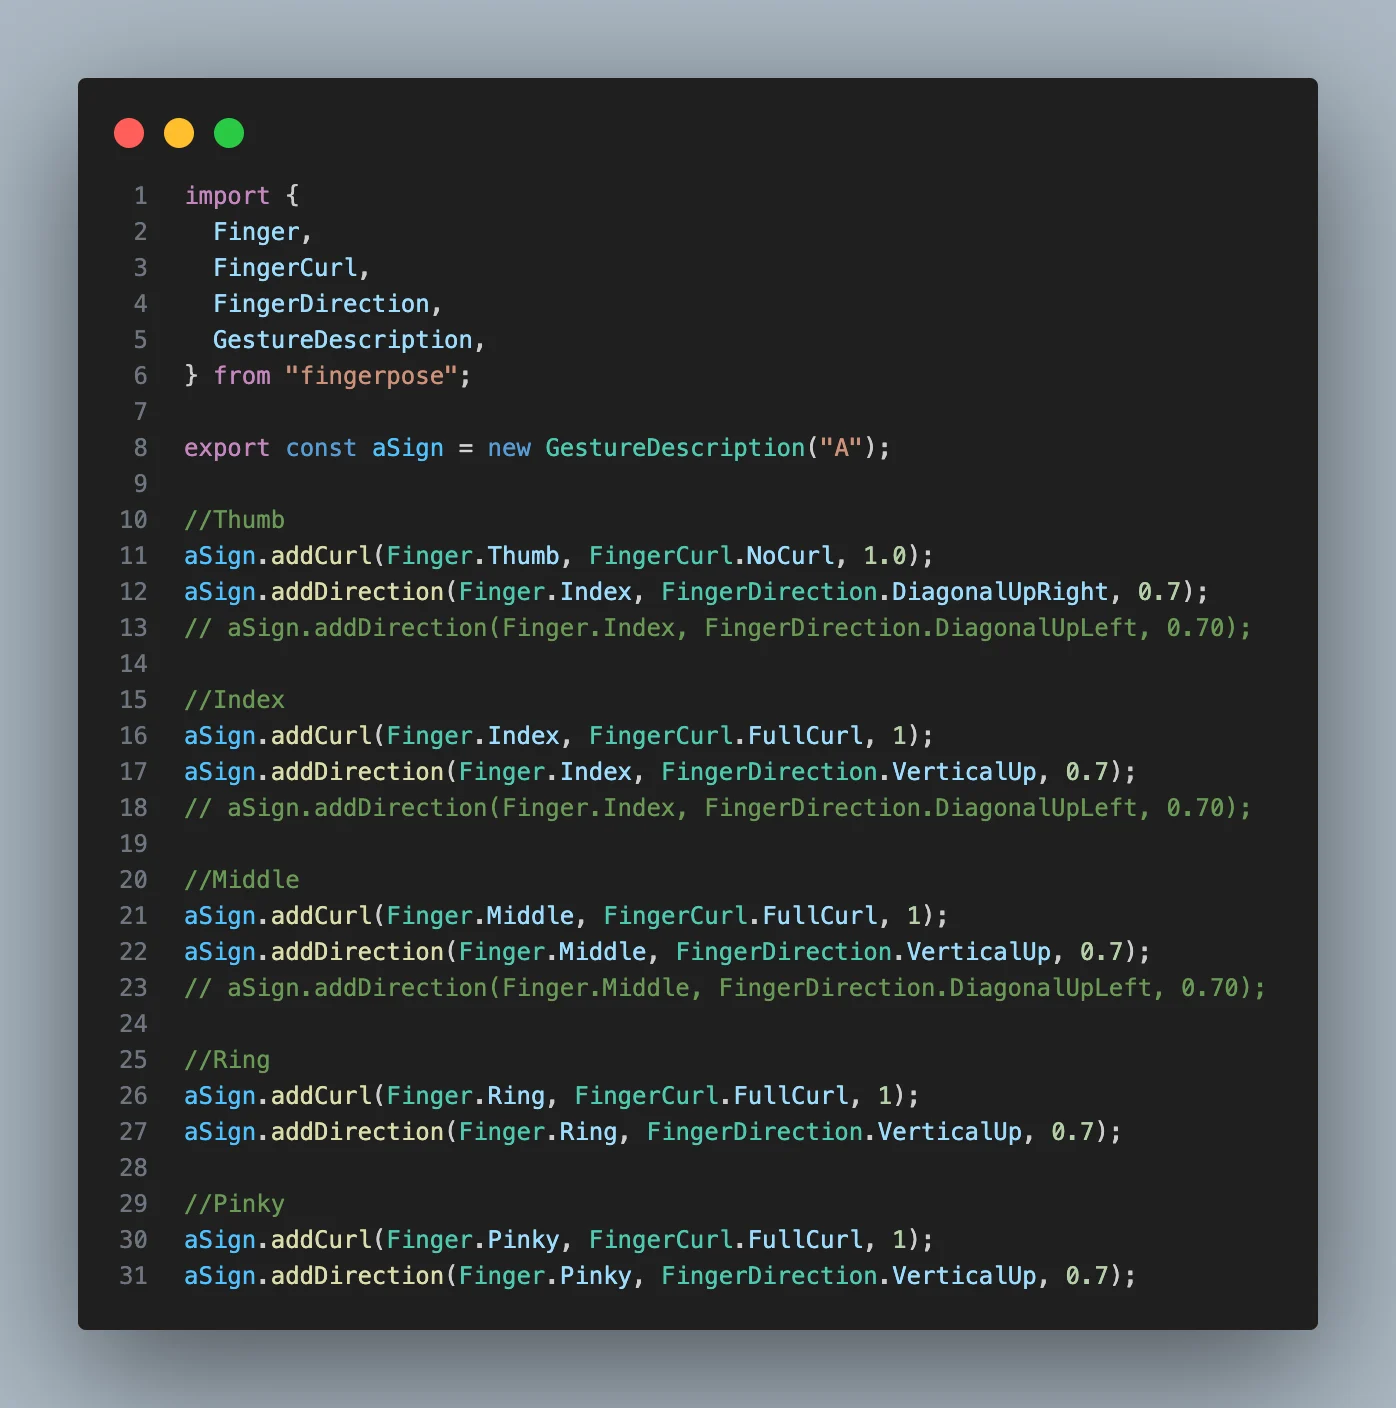
You can also get the handsigns folder from the 100-ms-vue repository. Looking at the screenshot, there is a GestureDescription instance that takes a string A which will represent what the hand sign will stand for. So, it could be anything you want the handsign to stand for.
onMountedis asynchronous because we need to ensure that our detection instance is created, which is required to detect the hand sign.
With the updated code, you should be able to display some letters.
Conclusion
Don't forget, you can see in detail how this was implemented in one of This Dot Labs' open source projects 100-ms-vue. Please note that what we did is just a basic implementation, and to have a production-ready version, it will need a bigger model, and a more complex detection to be able to identify hand sign language.