Skip to content

Remix Deployment with Architecture

This article was written over 18 months ago and may contain information that is out of date. Some content may be relevant but please refer to the relevant official documentation or available resources for the latest information.

Intro

Today’s article, will give a brief overview of the Architect framework and how to deploy a Remix app. I’ll cover a few different topics, such as what Architect is, why it’s good to use, and the issues I ran into while using it. It is a straightforward process, and I recommend using it with the Grunge Stack offered by Remix. So let’s jump on in and start talking about Architect.

Prerequisites

There are a few prerequisites and also some basic understandings that are expected going into this. The first is to have a GitHub account, then an AWS account, and finally some basic understanding of how to deploy. I also recommend checking out the Grunge Stack here if you run into any issues when we progress further.

What is Architect?

First off, Architect is a simple framework for Functional Web Apps (FWAs) on AWS. Now you might be wondering, "why Architect?" It offers the best developer experience, works locally, has infrastructure as code, is secured to the least privilege by default, and is open-source.

Architect prioritizes speed, smart configurable defaults, and flexible infrastructure. It also allows users to test things and debug locally. It defines a high-level manifest, and turns a complex cloud infrastructure into a build artifact. It complies the manifest into AWS CloudFormation and deploys it. Since it’s open-source, Architect prioritizes a regular release schedule, and backwards compatibility.

Remix deployment

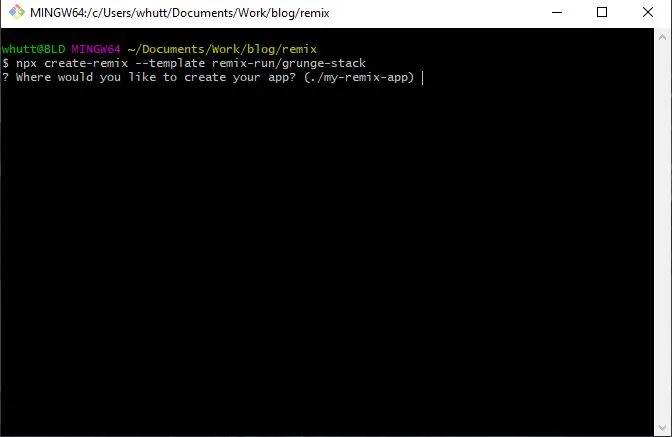
Deploying Remix with Architect is rather straightforward, and I recommend using the Grunge Stack to do it. First, we’re going to head on over to the terminal and run npx create-remix --template remix-run/grunge-stack. That will get you a Remix template with almost everything you need.

Generating remix template

br1

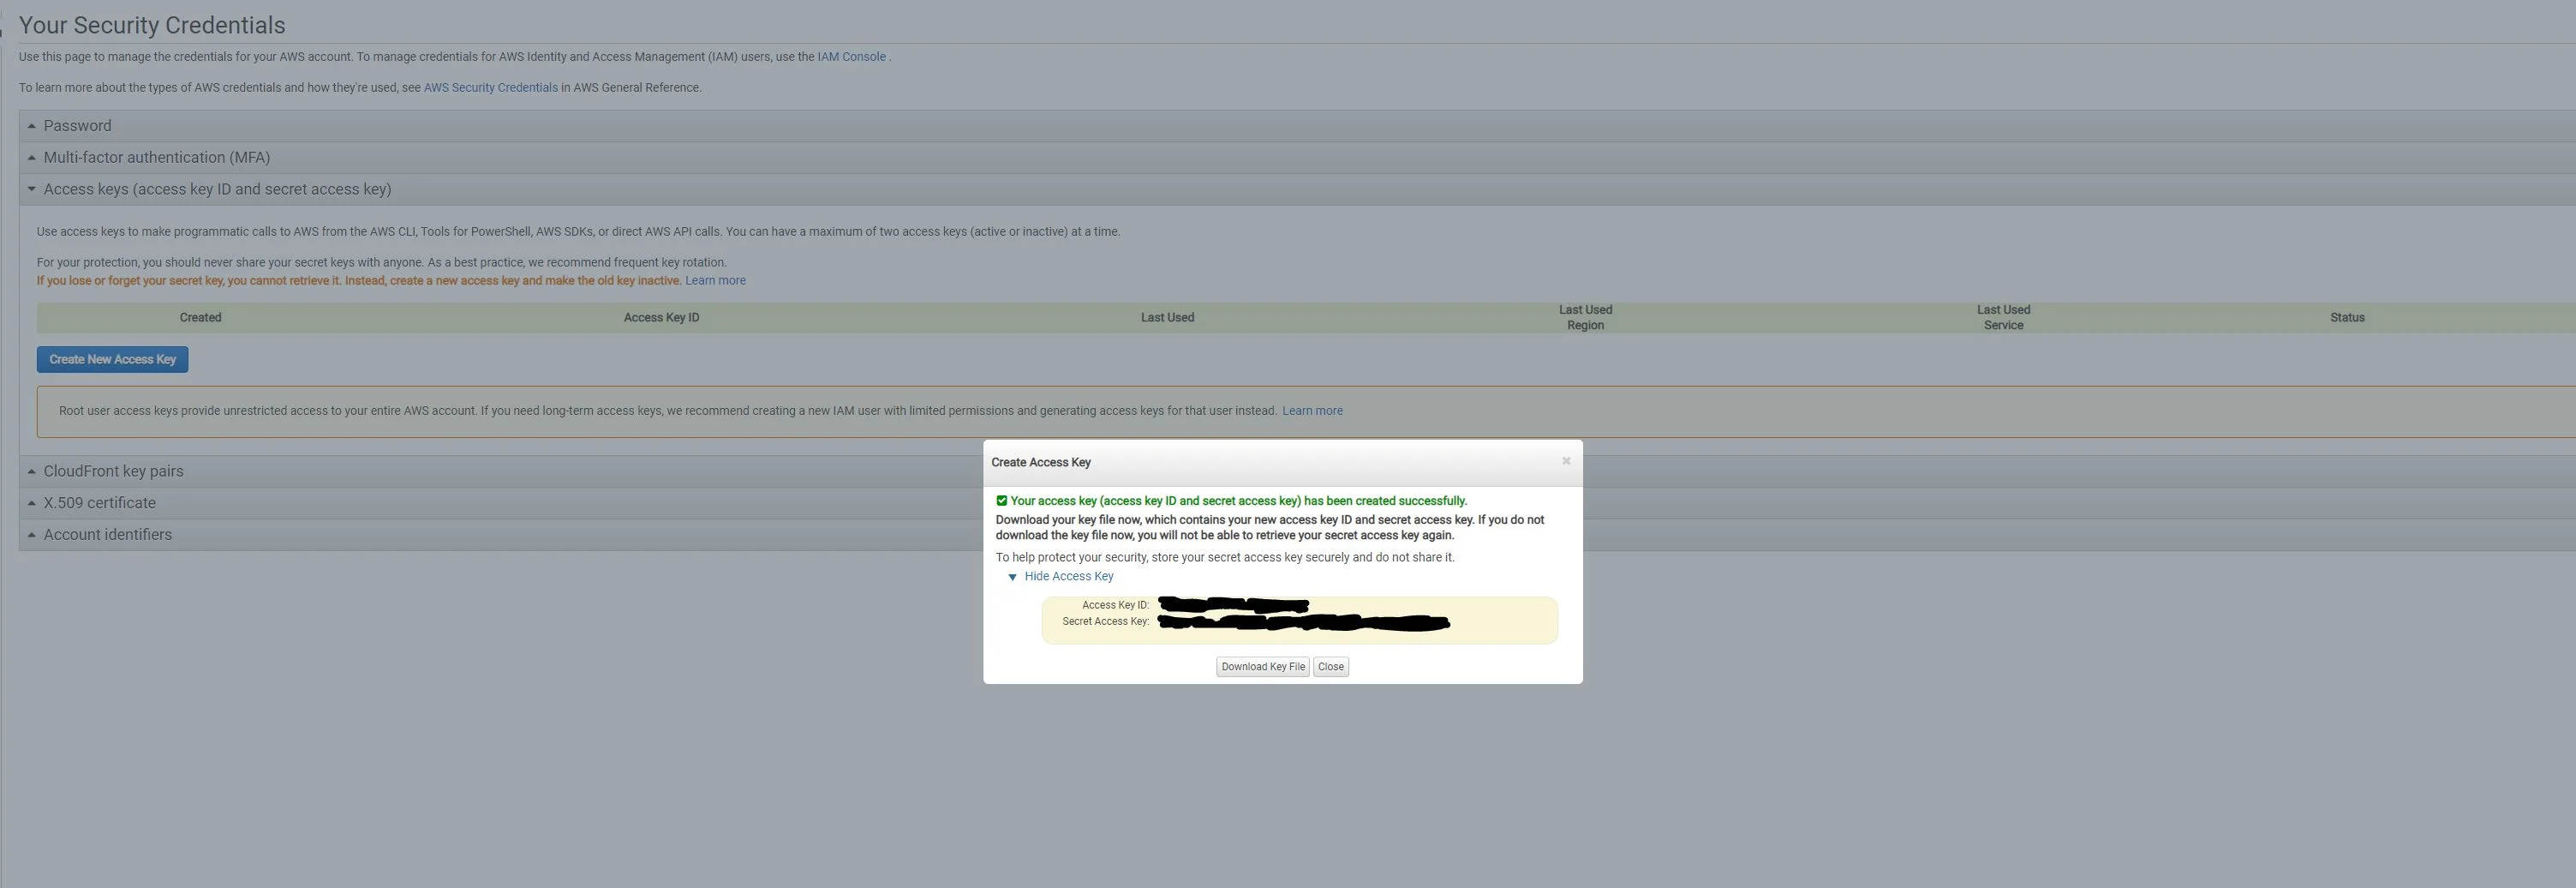
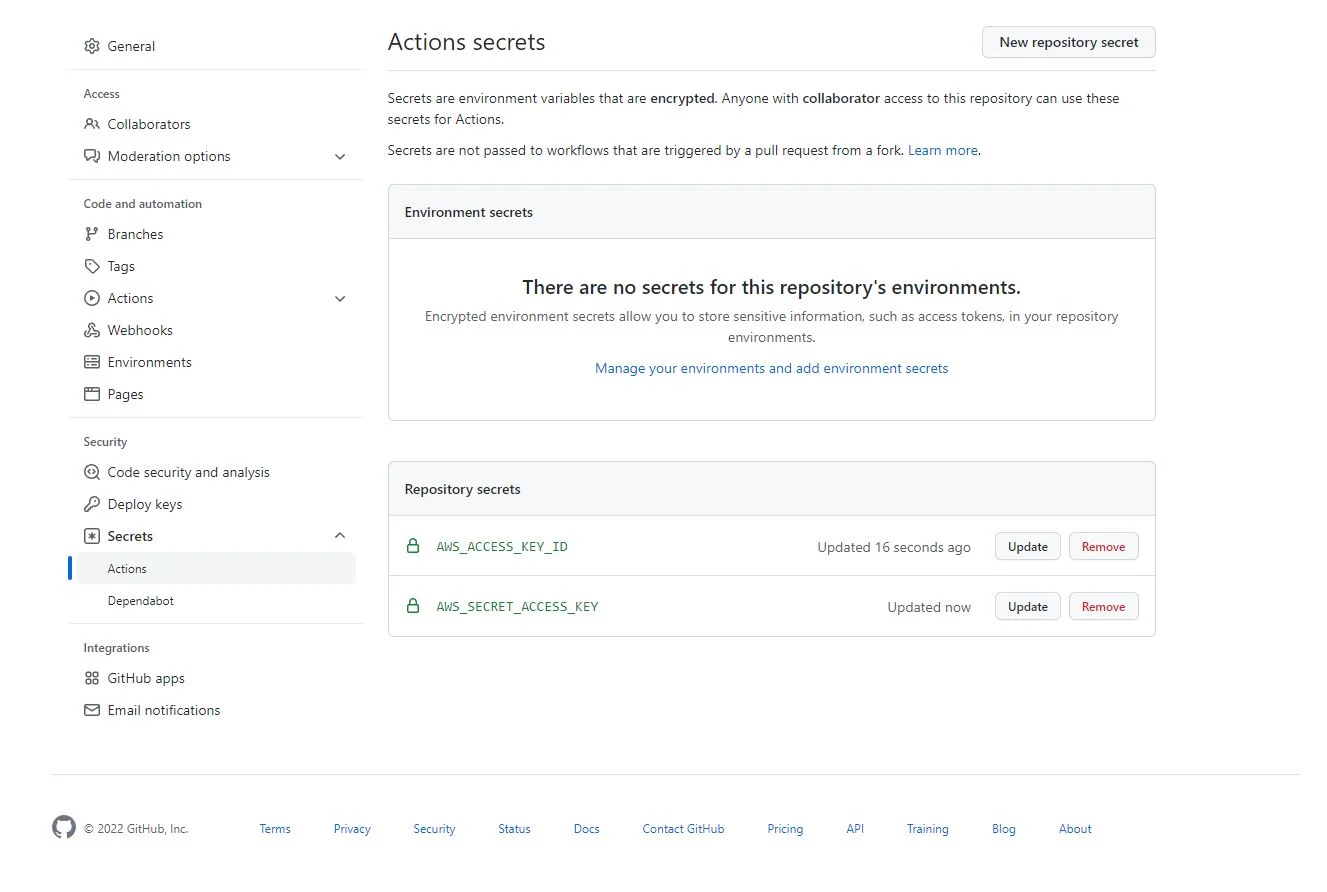
For the next couple of steps, you need to add your AWS_ACCESS_KEY_ID and AWS_SECRET_ACCESS_KEY to your repo’s secrets. You’ll need to create the secrets on your AWS account, and then add them to your repo.

AWS secrets

br3

GitHub secrets

br2

The last steps before deploying include giving CloudFormation a SESSION_SECRET of its own for both staging and production environments. Then you need to add an ARC_APP_SECRET.

Adding env variables

br4
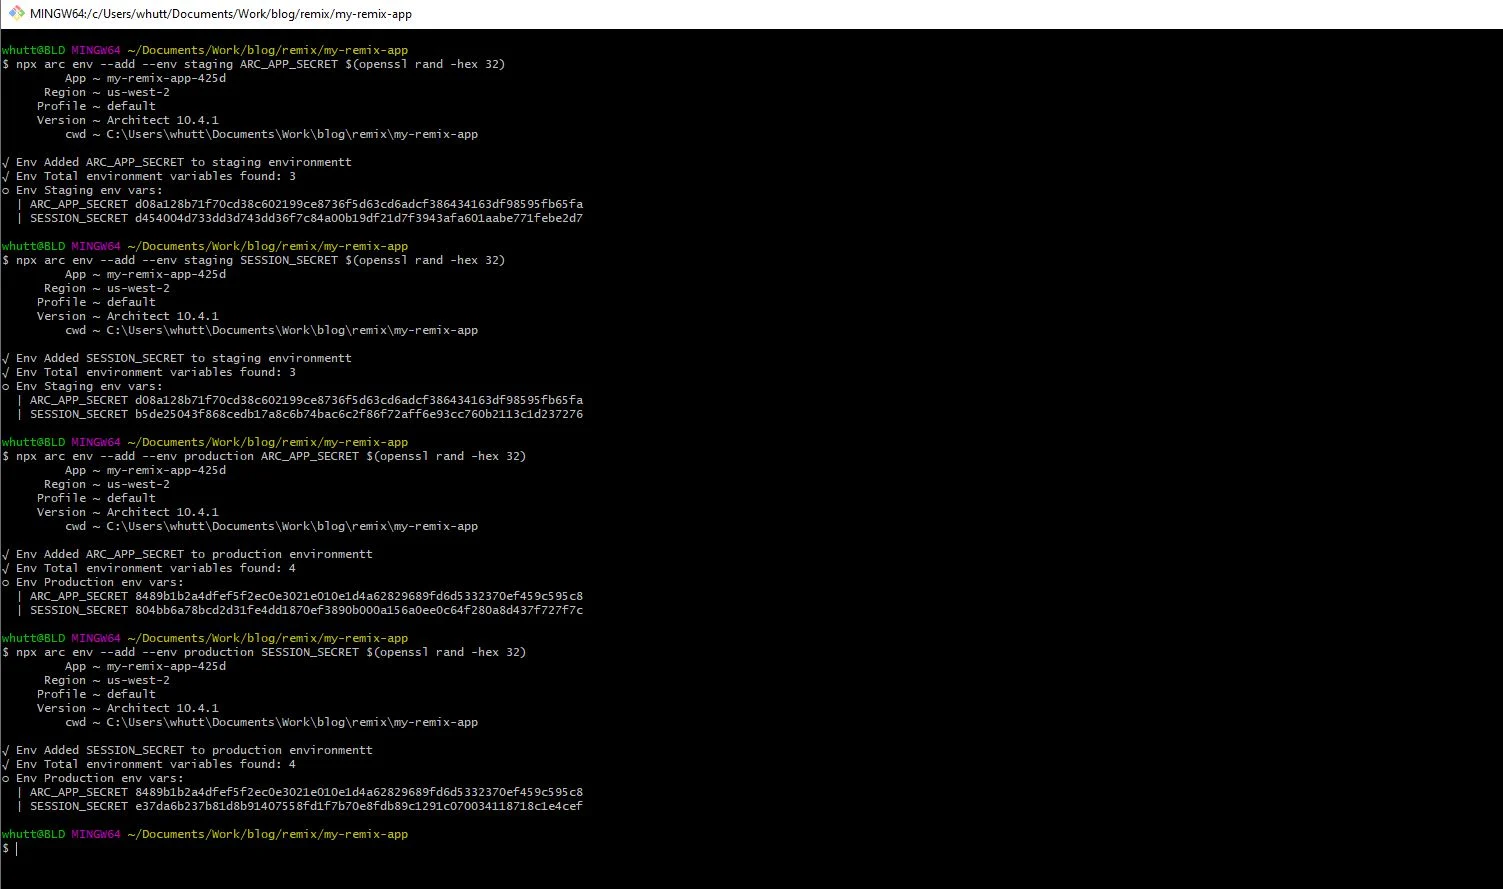
npx arc env --add --env staging ARC_APP_SECRET $(openssl rand -hex 32)
npx arc env --add --env staging SESSION_SECRET $(openssl rand -hex 32)
npx arc env --add --env production ARC_APP_SECRET $(openssl rand -hex 32)
npx arc env --add --env production SESSION_SECRET $(openssl rand -hex 32)

With all of that out of the way, you need to run npx arc deploy, which will deploy your build to the staging environment. You could also do npx arc deploy —-dry-run beforehand to verify everything is fine.

Issues I Had in My Own Project

Now let's cover some issues I had, and my solution for my own project. So, I had a project far into development, and while looking at the Grunge Stack, I was scratching my head, trying to figure out what was necessary to bring over to my existing project.

I had several instances of trial and error as I plugged in the Architect related items. For instance: the arc file, which has the app name, HTTP routes, static assets for S3 buckets, and the AWS configuration. I also had to change things like the remix.config file, adding a server.ts file, and adding Architect related dependencies in the package.json.

During this process, I would get errors about missing files or missing certain function dirs(), and I dumped a good chunk of time into it. So while continuing to get those errors, I concluded that I would follow the Grunge Stack, and their instructions for a new project. Then I would merge my old project with the new project; and that resolved my issues. While not the best way, it did get me going, and did not waste any more time.

That resolved my immediate issues of trying to get my Remix app deployed to AWS, but then I had to figure out what got pushed. That was easy, since it created a lambda, API gateway, and bucket based on the items in my arc file. Then I realized, while testing it out live, that my environmental variables hadn’t carried over, so I had to tweak those on AWS. My project also used a GitHub OAuth app. So that needed to be tweaked with the new URL. Then it was up and running.

Conclusion

Today’s article covered a brief overview of what Architect is, why it’s good to use, how to deploy a Remix app and the issues you might have. I hope it was useful and will give others a good starting point.

This Dot is a consultancy dedicated to guiding companies through their modernization and digital transformation journeys. Specializing in replatforming, modernizing, and launching new initiatives, we stand out by taking true ownership of your engineering projects.

We love helping teams with projects that have missed their deadlines or helping keep your strategic digital initiatives on course. Check out our case studies and our clients that trust us with their engineering.

You might also like

Remix's evolution to a Vite plugin cover image

Remix's evolution to a Vite plugin

The Remix / React Router news is a beautiful illustration of software evolution. You start with a clear idea of what you’re building, but it’s impossible to anticipate exactly what it will become. If you haven’t heard the news yet, Ryan Florence announced at React Conf 2024 that Remix will be a Vite plugin for React Router. It’s a sort of surprising announcement but it makes a lot of sense if you’ve been following along as Remix the project has evolved. In this post we’ll recap the evolution of the project and then dig into what this change means for the future of Remix in the Server Components era of React. 🗓️ October 2021 > Remix is open sourced In the beginning, Remix cost money. In October 2021 they received some seed funding and the project was open sourced. Remix was an exciting new framework for server-rendering React websites that included API’s for loading data on the server and submitting data to the server with forms. It started a trend in the front-end framework space that a lot of other popular frameworks have modeled after or taken inspiration from. 🗓️ March 2022 - September 2022 > Remixing React Router At some point they realized that the API’s that they had created for Remix were a more natural fit in React Router. In this post Ryan details the plans to move these Remix API’s into React Router. Several months later, React Router 6.4 is released with the action, loader, and other Remix API’s baked in. > "We've always thought of Remix as "just a compiler and server for React Router" After this release, Remix is now mostly as they described - a compiler and server for React Router. 🗓️ October 2023 - February 2024 > Remix gets Vite support If you’re not familiar with Vite, it’s an extremely popular tool for front-end development that handles things like development servers and code bundling/compiling. A lot of the modern front-end frameworks are built on top of it. Remix announced support for Vite as an alternative option to their existing compiler and server. Since Remix is now mostly “just a compiler and server for React Router” - what’s left of Remix now that Vite can handle those things? 🗓️ May 2024 > Remix is React Router The Remix team releases a post detailing the announcement that Ryan made at React Conf. Looking back through the evolution of the project this doesn’t seem like an out of the blue, crazy announcement. Merging Remix API’s into React Router and then replacing the compiler and server with Vite didn’t leave much for Remix to do as a standalone project. 🐐 React Router - the past, present, and future of React React Router is one of the oldest, and most used packages in the React ecosystem. > Since Remix has always been effectively "React Router: The Framework", we wanted to create a bridge for all these React Router projects to be able to upgrade to Remix. With Remix being baked into React Router and now supporting SPA mode, legacy React Router applications have an easier path for migrating to the next generation of React. https://x.com/ryanflorence/status/1791488550162370709 Remix vs React 19 If you’ve taken a look at React 19 at all, it turns out it now handles a lot of the problems that Remix set out to solve in the first place. Things like Server Components, Server Actions, and Form Actions provide the same sort of programming model that Remix popularized. https://x.com/ryanflorence/status/1791484663883829258 Planned Changes for Remix and React Router Just recently, a post was published giving the exact details of what the changes to Remix and React Router will look like. tl;dr For React Router * React Router v6 to v7 will be a non-breaking upgrade * The Vite plugin from Remix is coming to React Router in v7 * The Vite plugin simply makes existing React Router features more convenient to use, but it isn't required to use React Router v7 * v7 will support both React 18 and React 19 For Remix * What would have been Remix v3 is React Router v7 * Remix v2 to React Router v7 will be a non-breaking upgrade * Remix is coming back better than ever in a future release with an incremental adoption strategy enabled by these changes For Both * React Router v7 comes with new features not in Remix or React Router today: RSC, server actions, static pre-rendering, and enhanced Type Safety across the board The show goes on I love how this project has evolved and I tip my hat to the Remix/React Router team. React Router feels like a cozy blanket in an ecosystem that is going through some major changes which feels uncertain and a little scary at times. The Remix / React Router story is still being written and I’m excited to see where it goes. I’m looking forward to seeing the work they are doing to support React Server Components. A lot of people are pretty excited about RSC’s and there is a lot of room for unique and interesting implementations. Long live React Router 🙌....

How to set up local cloud environment with LocalStack cover image

How to set up local cloud environment with LocalStack

How to set up local cloud environment with LocalStack Developers enjoy building applications with AWS due to the richness of their solutions to problems. However, testing an AWS application during development without a dedicated AWS account can be challenging. This can slow the development process and potentially lead to unnecessary costs if the AWS account isn't properly managed. This article will examine LocalStack, a development framework for developing and testing AWS applications, how it works, and how to set it up. Assumptions This article assumes you have a basic understanding of: - AWS: Familiarity with S3, CloudFormation, and SQS. - Command Line Interface (CLI): Comfortable running commands in a terminal or command prompt. - JavaScript and Node.js: Basic knowledge of JavaScript and Node.js, as we will write some code to interact with AWS services. - Docker Concepts: Understanding of Docker basics, such as images and containers, since LocalStack runs within a Docker container. What is LocalStack? LocalStack is a cloud service emulator that runs in a single container on your laptop or in your CI environment. With LocalStack, you can run your AWS applications or Lambdas entirely on your local machine without connecting to a remote cloud provider! Whether you are testing complex CDK applications or Terraform configurations or just beginning to learn about AWS, LocalStack simplifies your testing and development workflow, relieving you from the complexity of testing AWS applications. Prerequisite Before setting up LocalStack, ensure you have the following: 1. Docker Installed: LocalStack runs in a Docker container, so you need Docker installed on your machine. You can download and install Docker from here. 2. Node.js and npm: Ensure you have Node.js and npm installed, as we will use a simple Node.js application to test AWS services. You can download Node.js from here. 3. Python: Python is required for installing certain CLI tools that interact with LocalStack. Ensure you have Python 3 installed on your machine. You can download Python from here. Installation In this article, we will use the LocalStack CLI, which is the quickest way to get started with LocalStack. It allows you to start LocalStack from your command line. Localstack spins up a Docker instance, Alternative methods of managing the LocalStack container exist, and you can find them here. To install LocalStack CLI, you can use homebrew by running the following command: ` If you do not use a macOS or you don’t have Brew installed, you can install the CLI using Python: ` To confirm your installation was successful, run the following: ` That should output the installed version of LocalStack. Now you can start LocalStack by running the following command: ` This command will start LocalStack in docker mode, and since it is your first installation, try to pull the LocalStack image. You should see the below on your terminal After the image is downloaded successfully, the docker instance is spun up, and LocalStack is running on your machine on port 4566. Testing AWS Services with LocalStack LocalStack lets you easily test AWS services during development. It supports many AWS products but has some limitations, and not all features are free. Community Version: Free access to core AWS products like S3, SQS, DynamoDB, and Lambda. Pro Version: Access to more AWS products and enhanced features. Check the supported community and pro version resources for more details. We're using the community edition, and the screenshot below shows its supported products. To see the current products supported in the community edition, visit http://localhost:4566/_localstack/health. This article will test AWS CloudFormation and SQS. Before we can start testing, we need to create a simple Node.js app. On your terminal, navigate to the desired folder and run the following command: ` This command will create a package.json file at the root of the directory. Now we need to install aws-sdk. Run the following command: ` With that installed, we can now start testing various services. AWS CloudFormation AWS CloudFormation is a service that allows users to create, update, and delete resources in an AWS account. This service can also automate the process of provisioning and configuring resources. We are going to be using LocalStack to test creating a CloudFormation template. In the root of the folder, create a file called cloud-formation.js. This file will be used to create a CloudFormation stack that will be used to create an S3 bucket. Add the following code to the file: ` In the above code, we import the aws-sdk package, which provides the necessary tools to interact with AWS services. Then, an instance of the AWS.CloudFormation class is created. This instance is configured with: region: The AWS region where the requests are sent. In this case, us-east-1 is the default region for LocalStack. endpoint: The URI to send requests to is set to http://localhost:4566 for LocalStack. You should configure this with environment variables to switch between LocalStack for development and the actual AWS endpoint for production, ensuring the same code can be used in both environments. credentials: The AWS credentials to sign requests with. We are passing new AWS.Credentials("test", "test") The params object defines the parameters needed to create the CloudFormation stack: StackName: The name of the stack. Here, we are using 'test-local-stack'. TemplateBody: A JSON string representing the CloudFormation template. In this example, it defines a single resource, an S3 bucket named TestBucket. The createStack method is called on the CloudFormation client with the params object. This method attempts to create the stack. If there is an error, we log it to the console else, we log the successful data to the console. Now, let’s test the code by running the following command: ` If we run the above command, we should see the JSON response on the terminal. ` AWS SQS The process for testing SQS with LocalStack using the aws-sdk follows the same pattern as above, except that we will introduce another CLI package, awslocal. awslocal is a thin wrapper and a substitute for the standard aws command, enabling you to run AWS CLI commands within the LocalStack environment without specifying the --endpoint-url parameter or a profile. To install awslocal, run the following command on your terminal: ` Next, let’s create an SQS queue using the following command: ` This will create a queue name test-queue and return queueUrl like below: ` Now, in our directory, let’s create a sqs.js file, and inside of it, let’s paste the following code: ` In the above code, an instance of the AWS.SQS class is created. The instance is configured with the same parameters as when creating the CloudFormation. We also created a params object which had the required properties needed to send a SQS message: QueueUrl: The URL of the Amazon SQS queue to which a message is sent. In our case, it will be the URL we got when we created a local SQS. Make sure to manage this in environment variables to switch between LocalStack for development and the actual AWS queue URL for production, ensuring the same code can be used in both environments. MessageBody: The message to send. We call the sendMessage method, passing the params object and a callback that handles error and data, respectively. Let’s run the code using the following command: ` We should get a JSON object in the terminal like the following: ` To test if we can receive the SQS message sent, let’s create a sqs-receive.js. Inside the file, we can copy over the AWS.SQS instance that was created earlier into the file and add the following code: ` Run the code using the following command: ` We should receive a JSON object and should be able to see the previous message we sent ` When you are done with testing, you can shut down LocalStack by running the following command: ` Conclusion In this article, we looked at how to set up a local cloud environment using LocalStack, a powerful tool for developing and testing AWS applications locally. We walked through the installation process of LocalStack and demonstrated how to test AWS services using the AWS SDK, including CloudFormation and SQS. Setting up LocalStack allows you to simulate various AWS services on your local machine, which helps streamline development workflows and improve productivity. Whether you are testing simple configurations or complex deployments, LocalStack provides the environment to ensure your applications work as expected before moving to a production environment. Using LocalStack, you can confidently develop and test your AWS applications without an active AWS account, making it an invaluable tool for developers looking to optimize their development process....

Setting Up a Shopify App and Getting Order Data cover image

Setting Up a Shopify App and Getting Order Data

Today, we are going on an adventure! We’re starting a three-part guide on creating a Shopify app and updating a customer's order with tracking information. For this article, it's assumed that you already have a Shopify store. If you want to skip ahead and look at the code, it can be found here. To start us off, we’ll use the Shopify Create app and then follow it up with retrieving customer orders. Shopify Create app Getting started with the Shopify Create app will be a quick and easy process. We’ll start by navigating to a directory where we want to create our app and run the following ` We’ll be greeted by a few different prompts asking for the project name, and building your app selection. Success! Now let's navigate into our new directory and do a yarn dev, and we’ll get a few options. We’ll choose to create it as a new app, add an app name, config name, and select the store we want to use. With that out of the way, we’ll open the preview by pressing the p button. It should automatically open it up in a window and show us an app install screen where we will click the Install app button. This should redirect us to our Remix app template screen Install Template Perfect! We now have a basic Shopify Create app up and running. Next, we will move on to adding in the ability to retrieve our customer orders. Orders query Alright, it’s customer order time! We’re going to be leaving the template mostly as is. We are going to focus on adding the call and verifying the data comes back. We’ll navigate over to our app/routes/app._index.jsx file and start changing the loader function. Start by removing: ` And replacing it with: ` Next, swap Wrap change { shop } in: ` With ` Follow that up with changing ` To ` Then, we’ll remove the View product button that has the old shop variable in it. When you go back and look at your application, you should see the Error: Access denied for fulfillmentOrders field. This is due to scopes that we haven’t updated. To fix this, we’ll head over to our shopify.app.toml file and replace ` with ` Here is what you should now have: ` We’ll now do another yarn dev which will tell us that our scopes inside the TOML don’t match the scopes in our Partner Dashboard. To fix this, we simply need to run: ` And then we’ll be prompted to confirm our changes with the difference shown. It will give us a success response, and now we can do another yarn dev to look at our application. Doing so brings us back to our old friend the app install page. Only this time it’s telling us to update the app and redirecting us back to the application page. Huh, seems like we’re getting a new error this time. For some reason, the app is not approved to access the FulfillmentOrder object. No worries, follow the link in that message. It should be https://partners.shopify.com/[partnerId]/apps/[appId]/customer_data Here, we select the Protected customer data and just toggle Store management and save. After this, go down to the Protected customer fields (optional) and do the same thing for Name, Email, Phone, and Address. With that all said and done, we’ll exit the page. After that, go back to our application, and refresh it. Tada! It works! We will see a toast notification at the bottom of the screen that says Orders received and in our terminal console, we will see our orders returning. Conclusion That was an exciting start to our three-part adventure. We covered a lot, from setting up a Shopify app to getting our orders back and everything up and running! Next time, we’ll be digging into how to get our fulfillment ids, which will be needed to update a customer's order with tracking information....

Implementing Dynamic Types in Docusign Extension Apps cover image

Implementing Dynamic Types in Docusign Extension Apps

Implementing Dynamic Types in Docusign Extension Apps In our previous blog post about Docusign Extension Apps, Advanced Authentication and Onboarding Workflows with Docusign Extension Apps, we touched on how you can extend the OAuth 2 flow to build a more powerful onboarding flow for your Extension Apps. In this blog post, we will continue explaining more advanced patterns in developing Extension Apps. For that reason, we assume at least basic familiarity with how Extension Apps work and ideally some experience developing them. To give a brief recap, Docusign Extension Apps are a powerful way to embed custom logic into Docusign agreement workflows. These apps are lightweight services, typically cloud-hosted, that integrate at specific workflow extension points to perform custom actions, such as data validation, participant input collection, or interaction with third-party services. Each Extension App is configured using a manifest file. This manifest defines metadata such as the app's author, support links, and the list of extension points it uses (these are the locations in the workflow where your app's logic will be executed). The extension points that are relevant for us in the context of this blog post are GetTypeNames and GetTypeDefinitions. These are used by Docusign to retrieve the types supported by the Extension App and their definitions, and to show them in the Maestro UI. In most apps, these types are static and rarely change. However, they don't have to be. They can also be dynamic and change based on certain configurations in the target system that the Extension App is integrating with, or based on the user role assigned to the Maestro administrator on the target system. Static vs. Dynamic Types To explain the difference between static and dynamic types, we'll use the example from our previous blog post, where we integrated with an imaginary task management system called TaskVibe. In the example, our Extension App enabled agreement workflows to communicate with TaskVibe, allowing tasks to be read, created, and updated. Our first approach to implementing the GetTypeNames and GetTypeDefinitions endpoints for the TaskVibe Extension App might look like the following. The GetTypeNames endpoint returns a single record named task: ` Given the type name task, the GetTypeDefinitions endpoint would return the following definition for that type: ` As noted in the Docusign documentation, this endpoint must return a Concerto schema representing the type. For clarity, we've omitted most of the Concerto-specific properties. The above declaration states that we have a task type, and this type has properties that correspond to task fields in TaskVibe, such as record ID, title, description, assignee, and so on. The type definition and its properties, as described above, are static and they never change. A TaskVibe task will always have the same properties, and these are essentially set in stone. Now, imagine a scenario where TaskVibe supports custom properties that are also project-dependent. One project in TaskVibe might follow a typical agile workflow with sprints, and the project manager might want a "Sprint" field in every task within that project. Another project might use a Kanban workflow, where the project manager wants a status field with values like "Backlog," "ToDo," and so on. With static types, we would need to return every possible field from any project as part of the GetTypeDefinitions response, and this introduces new challenges. For example, we might be dealing with hundreds of custom field types, and showing them in the Maestro UI might be too overwhelming for the Maestro administrator. Or we might be returning fields that are simply not usable by the Maestro administrator because they relate to projects the administrator doesn't have access to in TaskVibe. With dynamic types, however, we can support this level of customization. Implementing Dynamic Types When Docusign sends a request to the GetTypeNames endpoint and the types are dynamic, the Extension App has a bit more work than before. As we've mentioned earlier, we can no longer return a generic task type. Instead, we need to look into each of the TaskVibe projects the user has access to, and return the tasks as they are represented under each project, with all the custom fields. (Determining access can usually be done by making a query to a user information endpoint on the target system using the same OAuth 2 token used for other calls.) Once we find the task definitions on TaskVibe, we then need to return them in the response of GetTypeNames, where each type corresponds to a task for the given project. This is a big difference from static types, where we would only return a single, generic task. For example: ` The key point here is that we are now returning one type per task in a TaskVibe project. You can think of this as having a separate class for each type of task, in object-oriented lingo. The type name can be any string you choose, but it needs to be unique in the list, and it needs to contain the minimum information necessary to be able to distinguish it from other task definitions in the list. In our case, we've decided to form the ID by concatenating the string "task_" with the ID of the project on TaskVibe. The implementation of the GetTypeDefinitions endpoint needs to: 1. Extract the project ID from the requested type name. 1. Using the project ID, retrieve the task definition from TaskVibe for that project. This definition specifies which fields are present on the project's tasks, including all custom fields. 1. Once the fields are retrieved, map them to the properties of the Concerto schema. The resulting JSON could look like this (again, many of the Concerto properties have been omitted for clarity): ` Now, type definitions are fully dynamic and project-dependent. Caching of Type Definitions on Docusign Docusign maintains a cache of type definitions after an initial connection. This means that changes made to your integration (particularly when using dynamic types) might not be immediately visible in the Maestro UI. To ensure users see the latest data, it's useful to inform them that they may need to refresh their Docusign connection in the App Center UI if new fields are added to their integrated system (like TaskVibe). As an example, a newly added custom field on a TaskVibe project wouldn't be reflected until this refresh occurs. Conclusion In this blog post, we've explored how to leverage dynamic types within Docusign Extension Apps to create more flexible integrations with external systems. While static types offer simplicity, they can be constraining when working with external systems that offer a high level of customization. We hope that this blog post provides you with some ideas on how you can tackle similar problems in your Extension Apps....

Let's innovate together!

We're ready to be your trusted technical partners in your digital innovation journey.

Whether it's modernization or custom software solutions, our team of experts can guide you through best practices and how to build scalable, performant software that lasts.

Prefer email? hi@thisdot.co