Today, we are going on an adventure! We’re starting a three-part guide on creating a Shopify app and updating a customer's order with tracking information. For this article, it's assumed that you already have a Shopify store. If you want to skip ahead and look at the code, it can be found here. To start us off, we’ll use the Shopify Create app and then follow it up with retrieving customer orders.
Shopify Create app
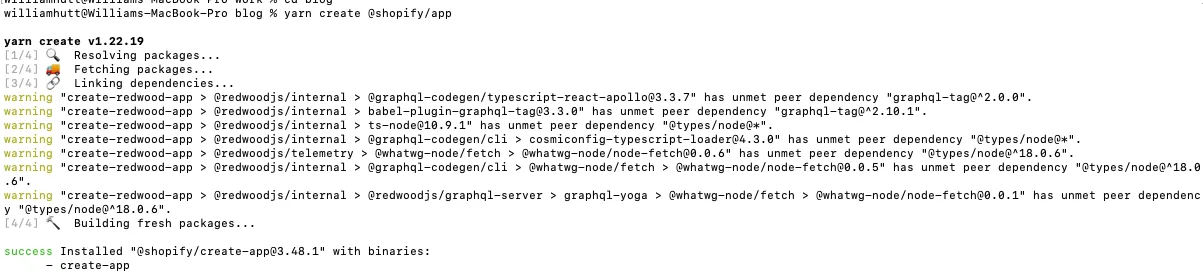
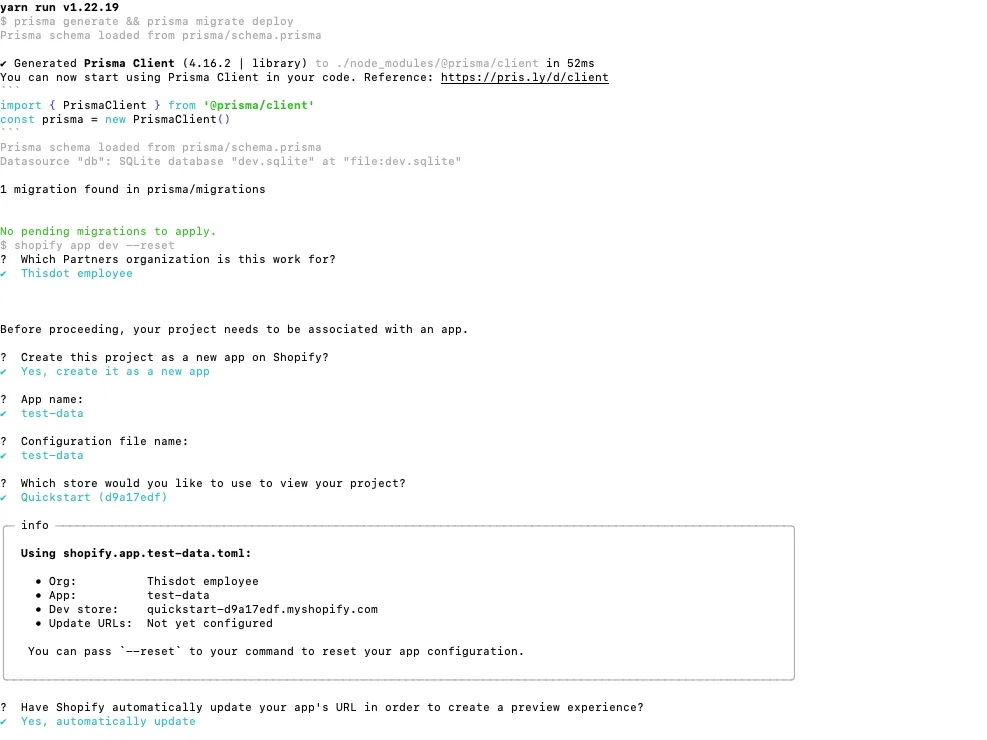
Getting started with the Shopify Create app will be a quick and easy process. We’ll start by navigating to a directory where we want to create our app and run the following
yarn create @shopify/app.
We’ll be greeted by a few different prompts asking for the project name, and building your app selection.
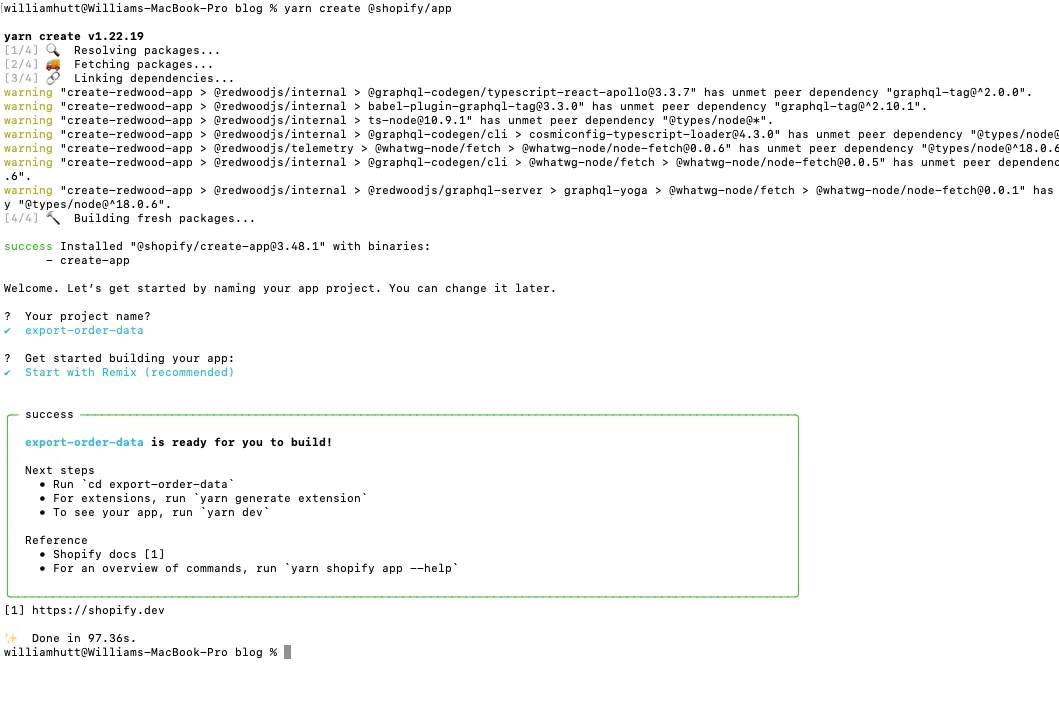
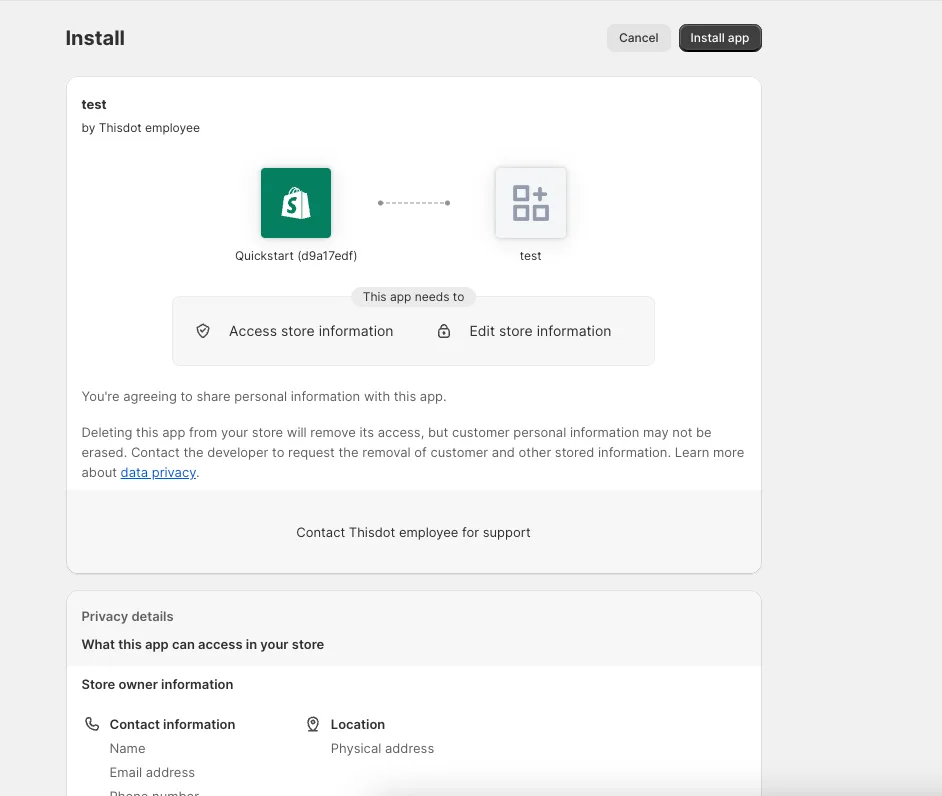
Success! Now let's navigate into our new directory and do a yarn dev, and we’ll get a few options. We’ll choose to create it as a new app, add an app name, config name, and select the store we want to use. With that out of the way, we’ll open the preview by pressing the p button.
It should automatically open it up in a window and show us an app install screen where we will click the Install app button. This should redirect us to our Remix app template screen
Install
Template
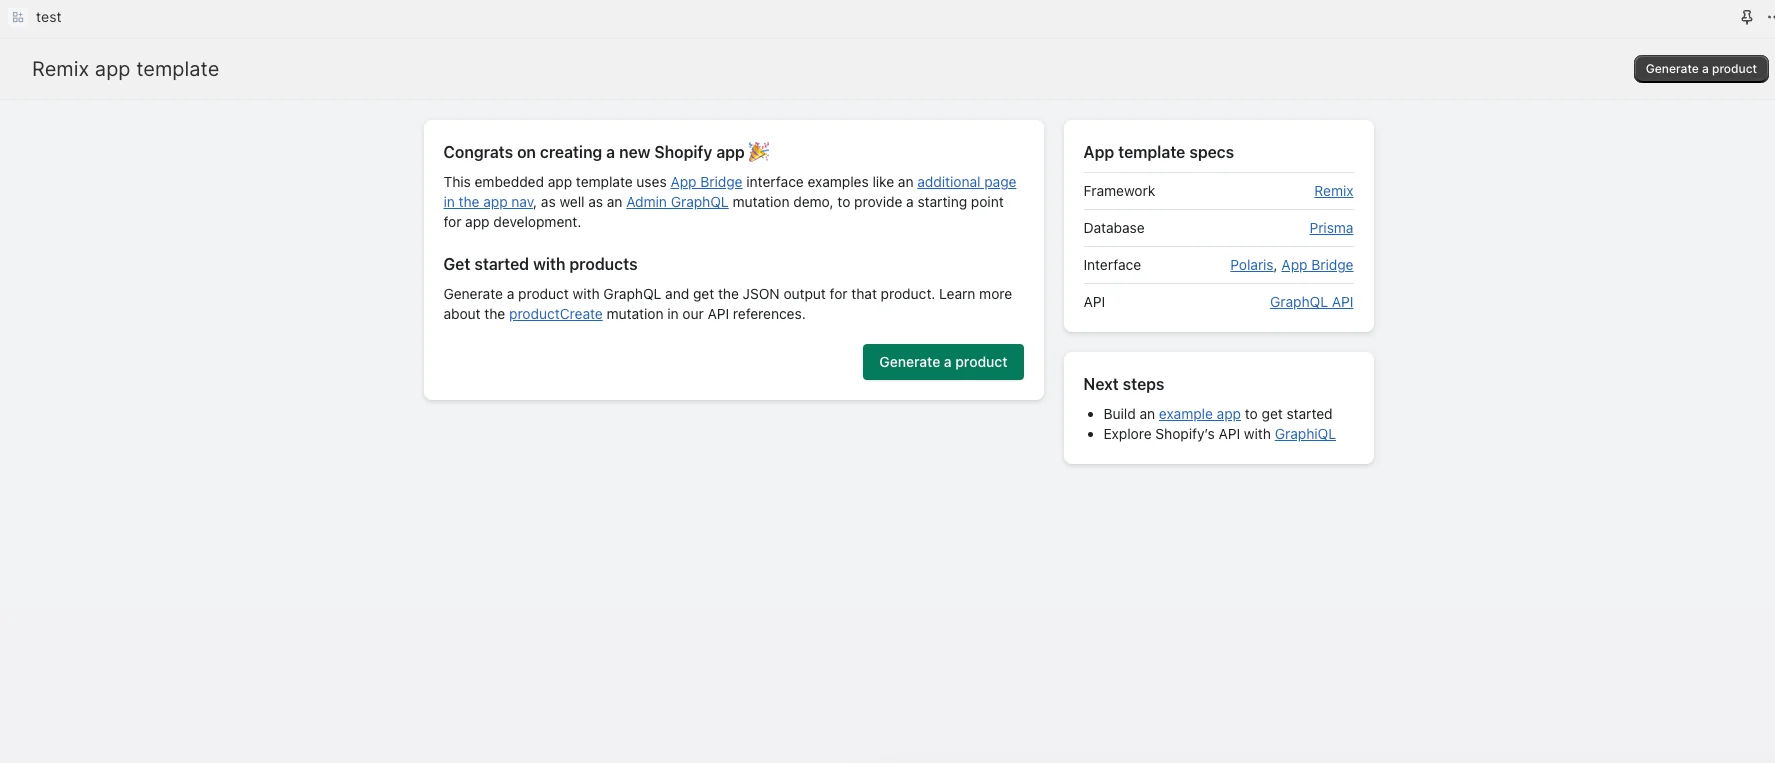
Perfect! We now have a basic Shopify Create app up and running. Next, we will move on to adding in the ability to retrieve our customer orders.
Orders query
Alright, it’s customer order time! We’re going to be leaving the template mostly as is. We are going to focus on adding the call and verifying the data comes back.
We’ll navigate over to our app/routes/app._index.jsx file and start changing the loader function.
Start by removing:
const { session } = await authenticate.admin(request);
return json({ shop: session.shop.replace(".myshopify.com", "") });
And replacing it with:
const { admin } = await authenticate.admin(request);
const response = await admin.graphql(
  `query getOrders {
      fulfillmentOrders (first: 30) {
        edges {
          node {
            requestStatus
            createdAt
            updatedAt
            status
            fulfillAt
            fulfillBy
            fulfillments (first: 10) {
              edges {
                node {
                  createdAt
                  deliveredAt
                  displayStatus
                  estimatedDeliveryAt
                  id
                  inTransitAt
                  legacyResourceId
                  name
                  status
                  totalQuantity
                  updatedAt
                  trackingInfo {
                    company
                    number
                    url
                  }
                 }
                }
               }
               order {
                 id
                 name
                 note
                 createdAt
                 displayFulfillmentStatus
               }
               assignedLocation {
                 address1
                 address2
                 city
                 countryCode
                 name
                 phone
                 province
                 zip
               }
               destination {
                 address1
                 address2
                 city
                 company
                 countryCode
                 email
                 firstName
                 lastName
                 phone
                 province
                 zip
               }
              }
             }
            }
           }
          `
         );
const responseJson = await response.json();
console.log("responseJson", responseJson);

const orders = responseJson?.data?.fulfillmentOrders?.edges?.map(
  (edge) => edge.node
) || [[]];

return json({
  orders: orders,
});
Next, swap Wrap change { shop } in:
const { shop } = useLoaderData();
With
Orders
Follow that up with changing
useEffect(() => {
  if (productId) {
    shopify.toast.show("Product created");
  }
 }, [productId]);
To
useEffect(() => {
  if (orders) {
     shopify.toast.show("Orders received");
  }
 }, [orders]);
Then, we’ll remove the View product button that has the old shop variable in it. When you go back and look at your application, you should see the Error: Access denied for fulfillmentOrders field. This is due to scopes that we haven’t updated.
To fix this, we’ll head over to our shopify.app.toml file and replace
scopes = “write_products”
with
scopes = "write_products,read_orders,read_assigned_fulfillment_orders,read_merchant_managed_fulfillment_orders,read_third_party_fulfillment_orders,write_assigned_fulfillment_orders,write_merchant_managed_fulfillment_orders,write_third_party_fulfillment_orders"
Here is what you should now have:
name = "blog-test"
client_id = "<insert client id>"
application_url = "https://speakers-terminals-informed-machines.trycloudflare.com"
embedded = true

[access_scopes]
# Learn more at https://shopify.dev/docs/apps/tools/cli/configuration#access_scopes
scopes = "write_products,read_orders,read_assigned_fulfillment_orders,read_merchant_managed_fulfillment_orders,read_third_party_fulfillment_orders,write_assigned_fulfillment_orders,write_merchant_managed_fulfillment_orders,write_third_party_fulfillment_orders"

[auth]
redirect_urls = [
  "https://speakers-terminals-informed-machines.trycloudflare.com/auth/callback",
  "https://speakers-terminals-informed-machines.trycloudflare.com/auth/shopify/callback",
  "https://speakers-terminals-informed-machines.trycloudflare.com/api/auth/callback"
]

[webhooks]
api_version = "2023-07"

[pos]
embedded = false

[build]
automatically_update_urls_on_dev = true
dev_store_url = "<insert dev url>"
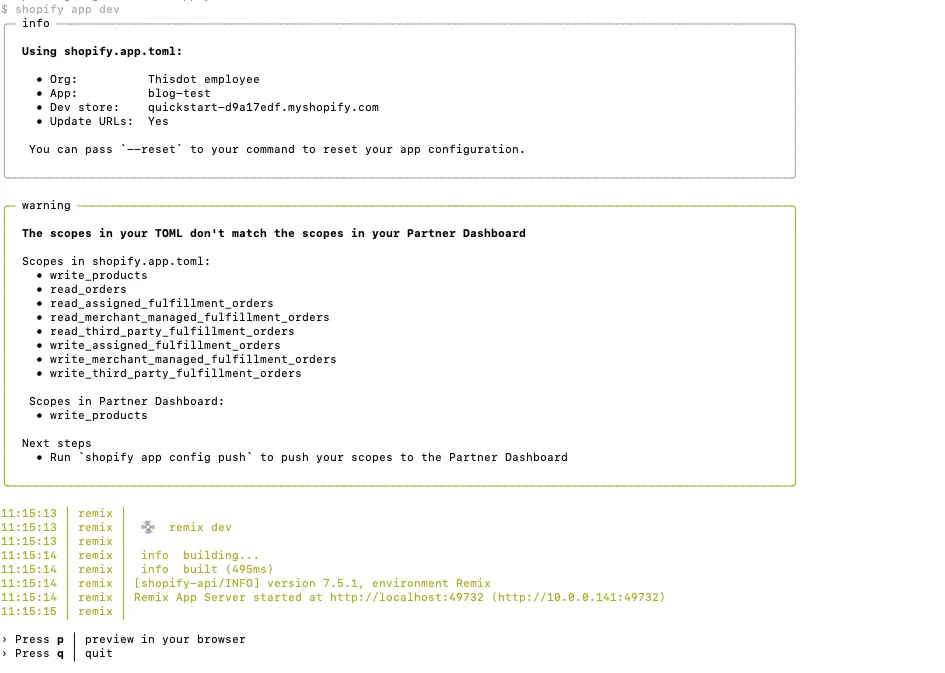
We’ll now do another yarn dev which will tell us that our scopes inside the TOML don’t match the scopes in our Partner Dashboard.
To fix this, we simply need to run:
yarn shopify app config push
And then we’ll be prompted to confirm our changes with the difference shown.
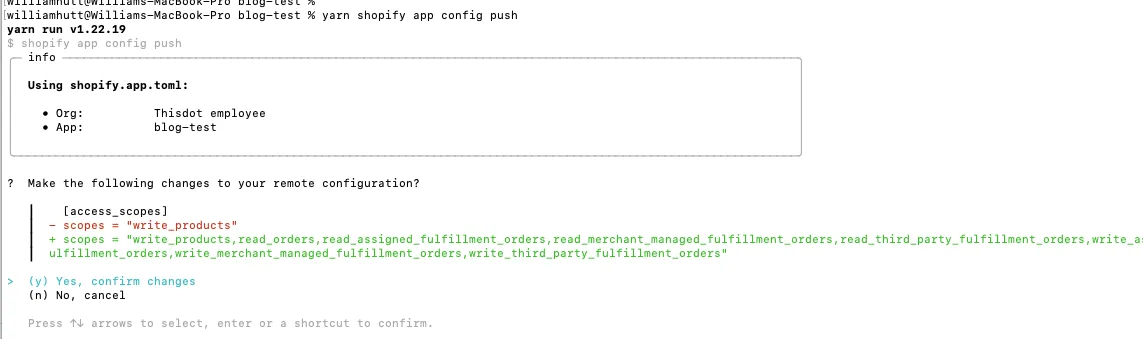
It will give us a success response, and now we can do another yarn dev to look at our application. Doing so brings us back to our old friend the app install page. Only this time it’s telling us to update the app and redirecting us back to the application page.
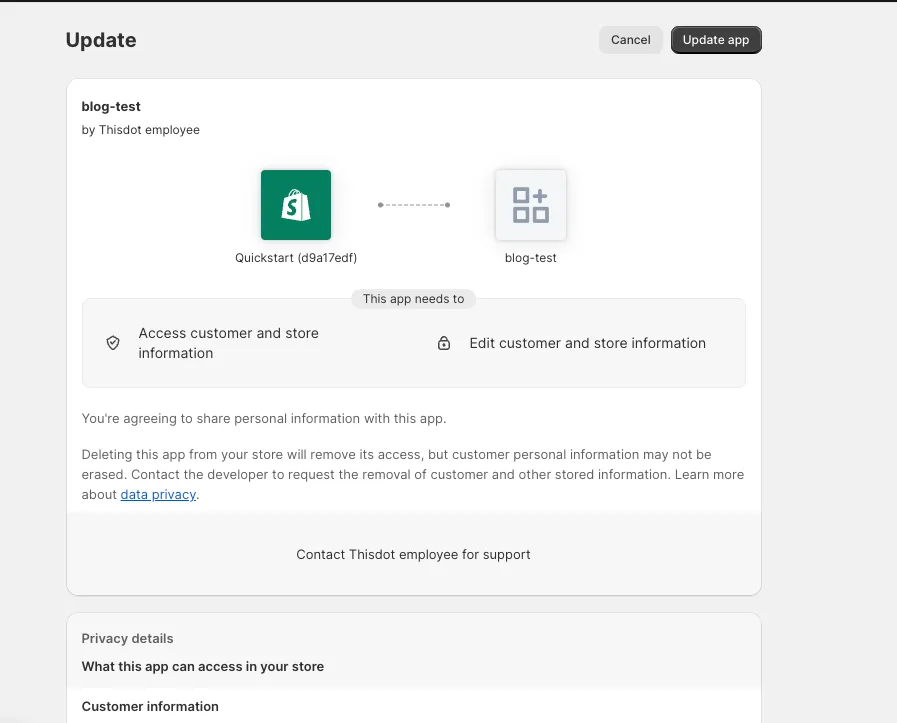
Huh, seems like we’re getting a new error this time. For some reason, the app is not approved to access the FulfillmentOrder object. No worries, follow the link in that message. It should be https://partners.shopify.com/[partnerId]/apps/[appId]/customer_data
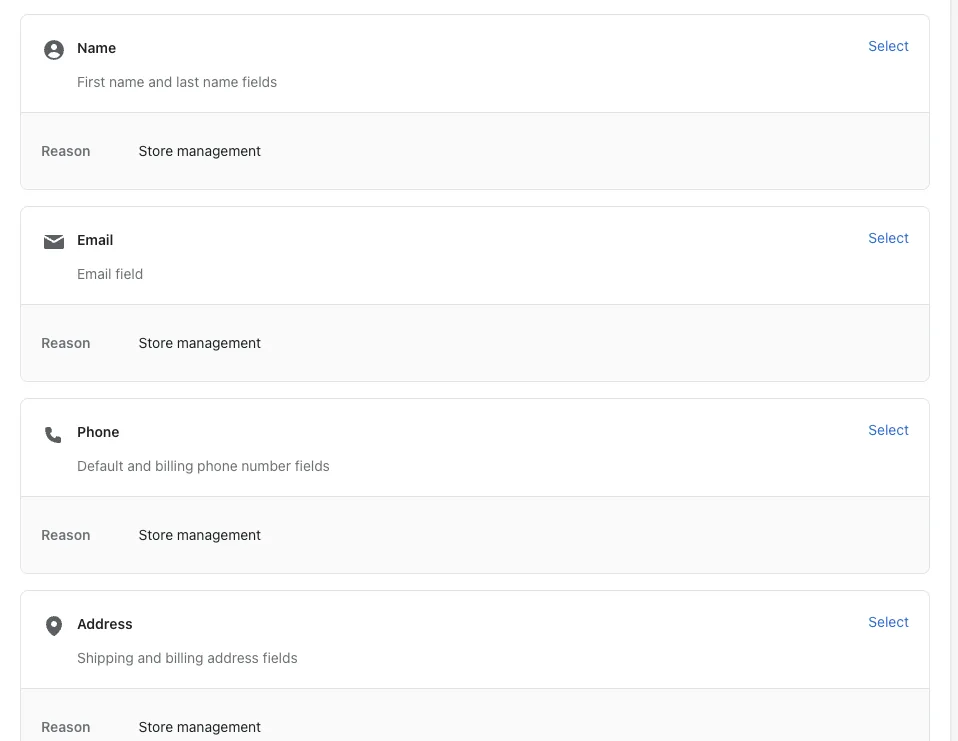
Here, we select the Protected customer data and just toggle Store management and save.

After this, go down to the Protected customer fields (optional) and do the same thing for Name, Email, Phone, and Address.
With that all said and done, we’ll exit the page. After that, go back to our application, and refresh it.
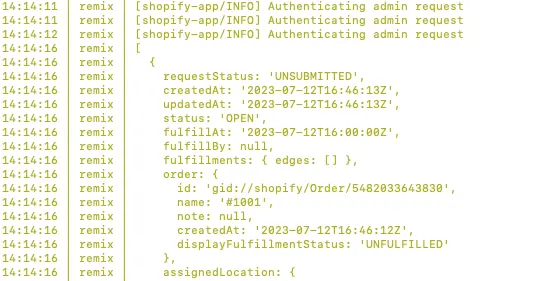
Tada! It works! We will see a toast notification at the bottom of the screen that says Orders received and in our terminal console, we will see our orders returning.
Conclusion
That was an exciting start to our three-part adventure. We covered a lot, from setting up a Shopify app to getting our orders back and everything up and running! Next time, we’ll be digging into how to get our fulfillment ids, which will be needed to update a customer's order with tracking information.