Introduction
AWS AppSync is an application development service hosted in AWS(Amazon Web Services) that helps in the development of flexible API’s for mobile and web development in real time. It enables data manipulation and combination from different data sources. The service also enables end users to update data within an application, even when their computer or mobile device is offline, and then performs synchronization when connectivity is regained.
How AWS AppSync Works
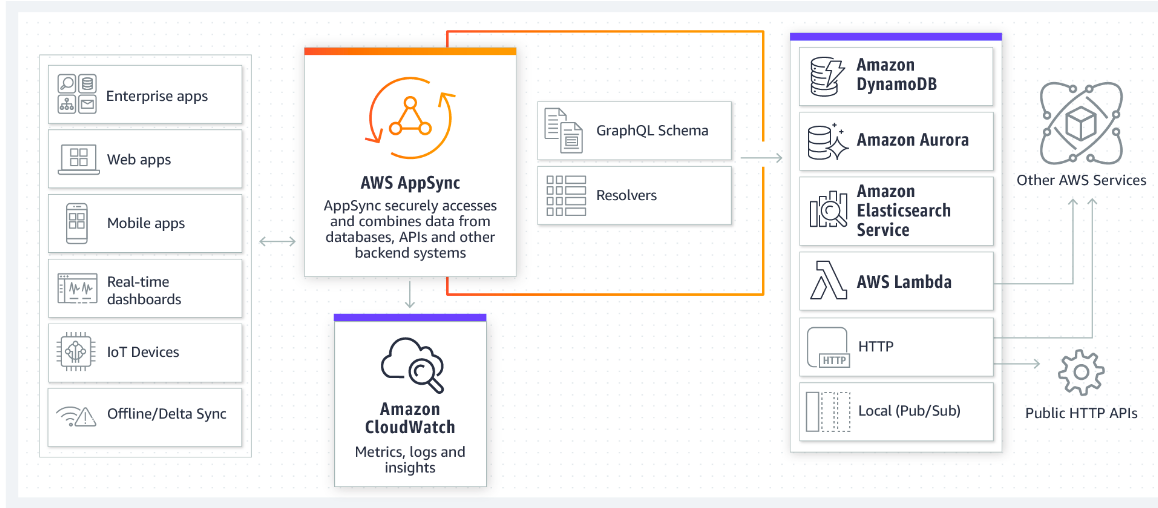
(Image Reference: https://aws.amazon.com/appsync/)
Getting Started with AWS AppSync
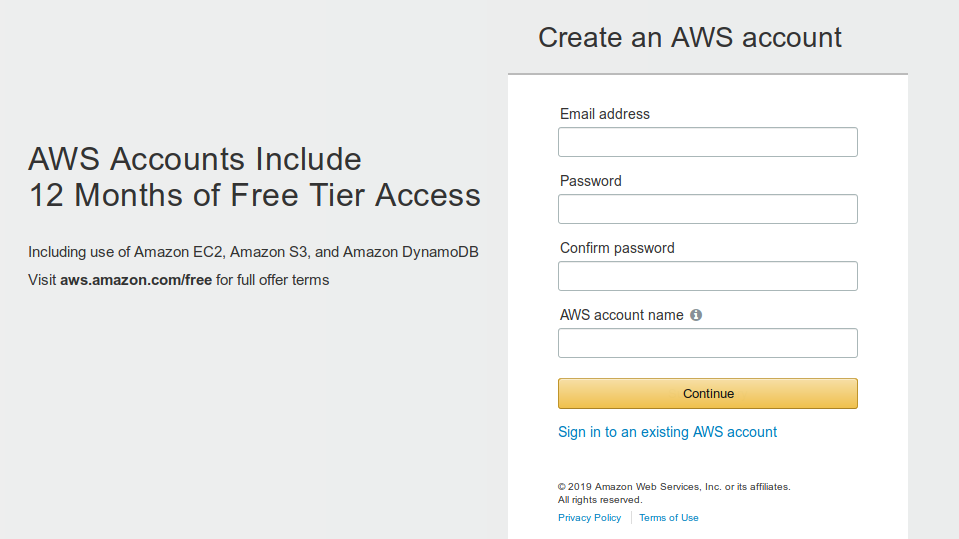
If you already have an AWS account, go ahead and login to that. Else go to the AWS sign up page and create a new account.
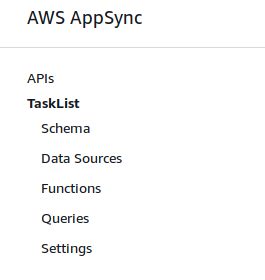
Once you are logged in open the AWS AppSync service and click on the "Create API" and go for the “Build From Scratch” option and name your API(eg: TaskList). Once you click on Create you are redirected to the below page and on clicking the “Download Config” button you get your “API URL” and “API KEY”.

And in the left navigation bar you have below 5 links:
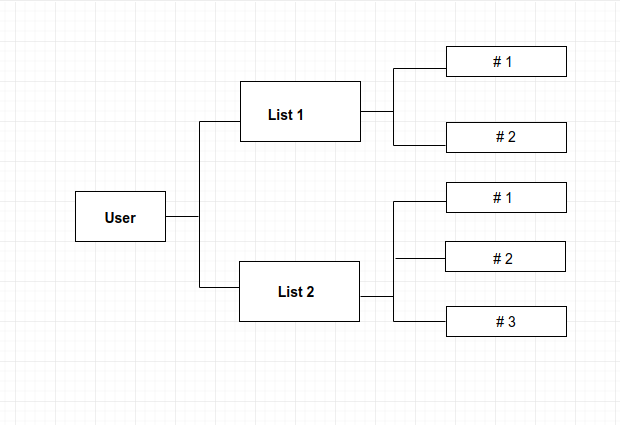
We will create a TaskList application where a user can create multiple lists with n number of tasks.
Features
- Todo Lists (create, read, update, delete)
- List Items (create, read, update, delete)
Designing the Schema
Schema in AWS is the place where we define our Types, Queries and Mutations. The GraphQL Types are used for defining the fields that will be accessible by GraphQL.
For our application we have:
Types
1.List Type
  type List {

	id: ID!

	name: String!

	description: String

}
2.Item Type
type Task {

	id: ID!

	list_id: ID!

	name: String!

	description: String

	date: String

	status: Boolean!

}
Queries
GraphQL has queries which are used to perform a GET request on the data.
- Lists-> Will return an array of lists
- List-> Will return a single list
- Tasks-> Will return an array of tasks
- Task-> Will return a single task
type Query {

	lists: [List]

	list(id: ID!): List

	tasks: [Task]

	task(id: ID!): Task

}
Mutations
Mutations perform the insert, update and delete on the data in the database.
-
createList
-
updateList
-
deleteList
-
createTask
-
updateTask
-
deleteTask
type Mutation {

	createTaskList(name: String!, description: String): List

	updateTaskList(id: ID!, name: String, description: String): List

	deleteTaskList(id: ID!): List

	createTask(

		list_id: ID!,

		name: String!,

		description: String,

		date: String,

		status: Boolean

	): Task

	updateTask(

		id: ID!,

		list_id: ID,

		name: String,

		description: String,

		date: String,

		status: Boolean

	): Task

	deleteTask(id: ID!): Task

}
Advantage of using the AppSync service
- Attaching Resolvers
The AppSync service creates all the resources for us, for all the types we defined in the schema, the AppSync creates a DynamoDB table for us.
Once you are done creating the schema, click on the CreateResource button as shown in the image.
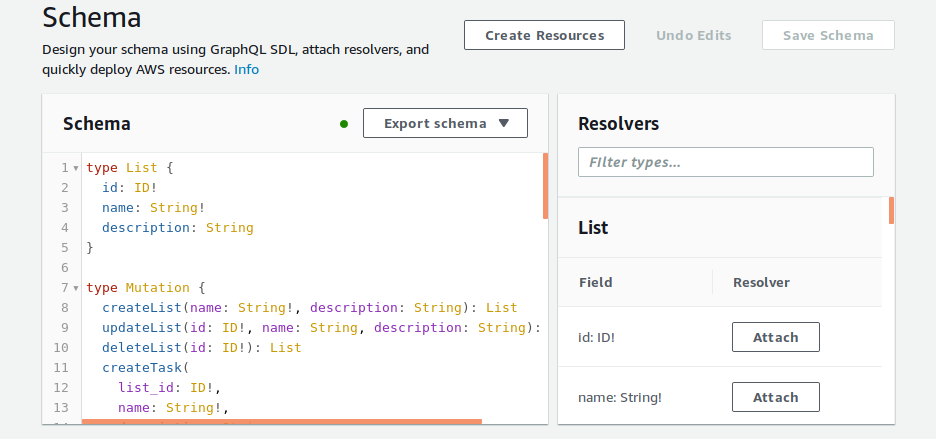
Go ahead and select one of the Types we created like I selected List.
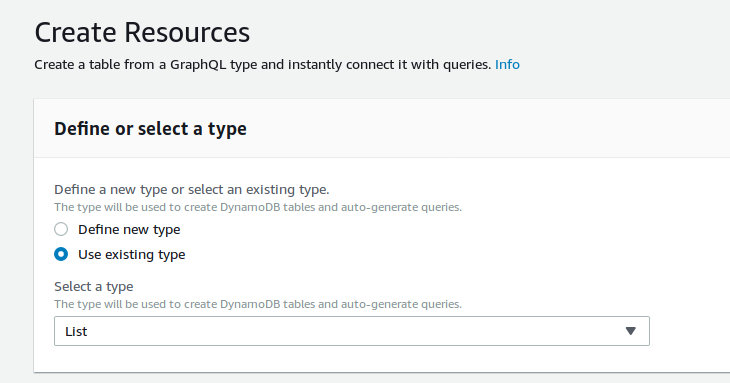
This will now let you mark the primary key and list down the Queries, Mutations and Subscriptions on this entity.
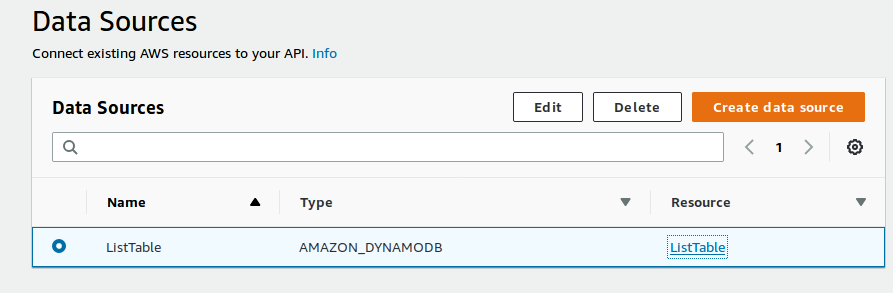
Now if we go to the DataSources on the left navigation bar we see the ListTable is created for us.
Let’s now create a list by moving to Queries from the left navigation bar. Our create query would look like:
mutation {

  createTaskList(name:"Shopping List",description:"Birthday Party") {

    id

    name

    description

  }

}
And the output it returns:
{

  "data": {

    "createTaskList": null

  }

}
Nothing happened, That's because we haven't linked our Mutations to the resolver (database) yet, Let's do that.
- Go to the Schema Page
- In the textbox below resolvers enter mutations, this will list only the mutations.
- Click on the "Attach" button next to createTaskList.
- It redirects you to a new page where you can select the ListTable that the resolver previously created for you.
- Now let’s run the createTaskList mutation again and see how the output looks like.
{

  "data": {

    "createTaskList": {

      "id": "2a75af52-64fb-458a-8f1d-6976eb899a98",

      "name": "Shopping List",

      "description": "Birthday Party"

    }

  }

}
- We do the similar task for both updateTaskList and deleteTaskList. We also create resolvers for Query list:[List] and list(...):List.
- Repeat the steps for Tasks.
- On running the list query we get the below output
{

  "data": {

    "lists": [

      {

        "id": "0d8afdc0-d67e-4fd7-afc5-db3535d8ae1f",

        "name": "Shopping List",

        "description": "Birthday Party"

      },

      {

        "id": "af6d0c21-f62c-4ad8-81fb-eba167d8574a",

        "name": "Shopping",

        "description": "Birthday Party List"

      },

      {

        "id": "2a75af52-64fb-458a-8f1d-6976eb899a98",

        "name": "Shopping List",

        "description": "Birthday Party"
  }

    ]

  }

}
2. Advanced Resolvers
For finding the list we run lists, for finding the tasks we run the tasks table, what if we need to find the tasks inside a list. GraphQL helps to achieve that with slightly updating the schema.
The schema change would be:
type Task {

	id: ID!

	list_id: ID!

	name: String!

	description: String

	date: String

	status: Boolean!

            list: List

}

type List {

	id: ID!

	name: String!

	description: String

            tasks: [Task]

}
This includes a change in the Resolver for eg: Attaching Resolver for list:List field for type Task, the below query will now give you the list of tasks inside a TaskList.
query {

  tasks {

    id

    name

    date

    list {

      id

      name

      description

    }
By this we come to the end of creating the backend using AWS AppSync, to use it in your application you can modify the schema based on the requirement and use the API URL and API KEY to integrate this backend within your project.