In this post, I'm going to talk about internationalization and how to implement it in an Angular application with the help of a neat library called Transloco.
What is Internationalization (I18N)?
I think it's best to start by explaining what internationalization (i18n for short - first letter of the word followed by the number of letters until the last letter of the word) is and why it is so important.
Internationalization is the process of adapting a software application to allow it to be easily used in multiple countries. There is a common misconception that this means that all text within an application must have translations for multiple languages; however, full i18n goes beyond just plain text in your application.
In many western countries, red is commonly used to signal danger. However, in some regions throughout the world, red is seen as a positive color.
Likewise, in many western countries, text is read from left to right; however, in some languages text is read from right to left.
Another example of where i18n comes into play is in images. If an image in your application contains text, to fully support i18n, it may be appropriate to generate multiple images each with the correct translations for the languages you support in your application. You would then need to serve the correct image depending on what country the user using your application is located in.
Naomi Meyer gave a brilliant talk on this subject at AngularConnect. You can watch that talk here if you are interested in learning more about. It's worth watching!
What is Transloco?
Transloco is a library developed and maintained by the NgNeat team. It contains a multitude of features and officially supported plugins to help make translating your Angular applications easy, maintainable, scalable and performant. It is actively maintained and it supports:
- Lazy loading
- Multiple fallbacks
- Server-side rendering
- Localization (l10n)
- Runtime language changing
- Multiple languages simultaneously
- Pluralization (through an official plugin)
It's very easy to set up and use as we'll see in the next part of this post!
Integrating Transloco into an Angular Application
Now it's time to get our hands into some code! Let's start with a clean slate. I'll assume you have nodejs and npm installed already. If not, I recommend using the LTS version!
Installation
If you don't already have the Angular CLI installed globally, run the following command in your favourite shell:
npm install -g @angular/cli
This will install the Angular CLI globally. Next, we'll create a new app using the Angular CLI:
ng new transloco-test
You'll be given a few prompts. To try out the library, we don't need anything too crazy:
➜ ng new transloco-test
? Would you like to add Angular routing? No
? Which stylesheet format would you like to use? CSS
Now we'll need to navigate into the newly created transloco-test folder:
cd transloco-test
From here we can use the ng add command to add Transloco to our application.
Note: By running the ng add Schematic, Transloco will automatically create files in our project to cover the initial set up process!
ng add @ngneat/transloco
After running this command we'll see some prompts from the library for the initial set up. For now, we will stick to the defaults:
? 🌍 Which languages do you need? en, es
? 🚀 Are you working with server side rendering? No
We will also see that some files were created and updated:

Let's take a quick look at these files.
tranloco.config.js - stores some basic configuration settings used by some additional Transloco tools.
src/assets/i18n/{en|es}.json - these are the files in which our translations are stored. Usually, one file per language supported. They are set up as key-value pairs, however, Transloco does support nested keys.
src/app/transloco/transloco-root.module.ts - this file sets up the Transloco module, config, transpiler and translation loader.
Let's take a closer look at this file.
@Injectable({ providedIn: "root" })
export class TranslocoHttpLoader implements TranslocoLoader {
  constructor(private http: HttpClient) {}

  getTranslation(lang: string) {
    // We can see here that the file names of our translations are important
    // They must match the available languages in our app
    return this.http.get<Translation>(`/assets/i18n/${lang}.json`);
  }
}

@NgModule({
  exports: [TranslocoModule],
  providers: [
    {
      provide: TRANSLOCO_CONFIG,
      useValue: translocoConfig({
        // These strings of available langs must match our translation file names
        availableLangs: ["en", "es"],
        defaultLang: "en",
        // Remove this option if your application doesn't support changing language in runtime.
        reRenderOnLangChange: true,
        prodMode: environment.production,
      }),
    },
    { provide: TRANSLOCO_LOADER, useClass: TranslocoHttpLoader },
  ],
})
export class TranslocoRootModule {}
This file stores the configuration and the translation loading strategy that Transloco will use to fetch the translations for our app.
It's important to note that the filenames of our translation files must match the array of availableLangs that we support in the app.
Adding Translations to our templates
Transloco provides multiple methods for fetching translations in our templates:
- Pipe
- Attribute Directive
- Structural Directive
Let's look at how to do each in turn.
First, we will set up some translations in our en.json located in our assets/i18n folder:
{
  "title": "Transloco Test",
  "welcomeText": "Hello {{ name }}"
}
Notice that welcomeText contains {{ name }}: this is a dynamic value that we pass into the translation.
We will also up es.json. You can translate this yourself if you want, I'm just going to prefix the translations with ES- to show the differentiation between the translations:
{
  "title": "ES- Transloco Test",
  "welcomeText": "ES- Hello {{ name }}"
}
Open up app.component.html and delete all the content in the file and insert the following:
<div>
  <h1>{{ 'title' | transloco }}</h1>
  <h3>{{ 'welcomeText' | transloco: {name: 'World'} }}</h3>
</div>
Now if you run the app using ng serve you should see the following:
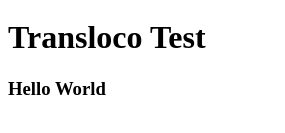
Awesome! Transloco was able to find our keys and successfully fetch the correct translations for it!
We can also use an attribute directive to achieve the same result:
<div>
  <h1 transloco="title"></h1>
  <h3 transloco="welcomeText" [translocoParams]="{name: 'World'}"></h3>
</div>
I personally feel like this approach works well when you aren't providing dynamic values to the translation and are just using transloco="title". With multiple params it could get messy.
The final option for performing translations in the template is to use a structural directive. My favourite method personally.
<div *transloco="let t">
  <h1>{{ t('title') }}</h1>
  <h3>{{ t('welcomeText', {name: 'World'}) }}</h3>
</div>
All three approaches will give the same output; however, there is a performance benefit to using the structural directive approach. It only uses one subscription to update the full template during language changes and change detection cycles.
We can also get translations in your TS files if we need them:
Open app.component.ts and inject TranslocoService into the constructor.
constructor(
    private readonly translocoService: TranslocoService
){}

ngOnInit() {
    // We can then use the service to fetch translations
    const example = this.translocoService.translate('welcomeText', {
      name: 'World',
    });
}
Supporting Runtime Language Change
One of the greatest features of Transloco is that it allows you to change the language of the translations at runtime. And it's super simple to do!
Open up the app.component.ts file and create a new method:
  switchLanguage() {
    if (this.translocoService.getActiveLang() === 'en') {
      this.translocoService.setActiveLang('es');
    } else {
      this.translocoService.setActiveLang('en');
    }
  }
Now, when this method is called the translations will be changed from en to es.
Open app.component.html and add a button to toggle the language:
<div>
<h1>{{ "title" | transloco }}</h1>
<h3>{{ "welcomeText" | transloco: { name: "World" } }}</h3>
</div>
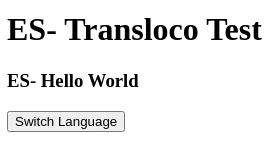
<button (click)="switchLanguage()">Switch Language</button>
Now, when we click on the button we should see our translations update in real-time:
Pluralization Support
It's fantastic being able to set translations and have them rendered on screen, but what about the following scenario?
{{ numberOfSeconds }} seconds remaining
If numberOfSeconds is 1, that should read 1 second remaining but it won't. It will always render 1 seconds remaining.
That's a problem! However, Transloco has an official plugin that adds MessageFormat support.
The MessageFormat Plugin can be easily added to our app and used to support pluralization and gender in our translations.
Let's see how to add it. First, we need to install two new packages:
npm i messageformat @ngneat/transloco-messageformat
Then we need to initialize it in our TranslocoRootModule, so open transloco/transloco-root.module.ts and add the following to the imports array:
@NgModule({
  imports: [
    TranslocoMessageFormatModule.init()
  ]
  ...
})
export class TranslocoRootModule {}
And voila! Support has been added. But how do we use it?
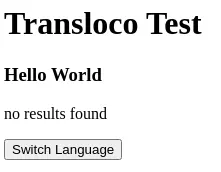
Let's implement a {{ numOfResults }} search results translation to see it being used.
Open assets/i18n/en.json and add the following key-translation pair:
{
    ...,
    "searchResults": "{numOfResults, plural, =0 {no results found} one {1 search result} other {# search results}}"
}
Now in our app.component.html add the following below the welcome text:
<p>{{ t('searchResults', numOfResults) }}</p>
Finally, in your app.component.ts set a new property called numOfResults:
export class AppComponent {
    numOfResults = 0;

    ...
}
Change the value of numOfResults to see the translation change appropriately!
Final Regards
Hopefully, this article shows how easy it is to implement I18N support into our Angular apps with the help of Transloco! Transloco has so many more features and plugins available to make your i18n experience even nicer.
Two that I'd like to call out are:
Translation Flattening
Transloco supports nested keys:
{
  "aria": {
    "label": "My Translatable A11Y Label"
  }
}
To resolve this, it must loop through each layer of nesting to find the appropriate key. Transloco has a tool available which will flatten the file to:
{
  "aria.label": "My Translatable A11Y Label"
}
Allowing for an O(1) (Big O Notation) lookup. Here's a link to the docs on how to achieve it: https://ngneat.github.io/transloco/docs/tools/optimize
Monorepo Support
Transloco also has a tool to extract translations from libraries within a monorepo, or from npm packages, to allow for more control over where we place our translations, allowing them to be close to the files they are used in. Here is a link to the documentation surrounding the Scoped Library Extractor Tool