
Supercharging Next.js Development with Tailwind CSS
When creating a new Next.js project (and in general, any React.js application), choosing a styling solution can be a time-consuming part of the process. While there are plenty of approaches to styling a React.js application, in this case, we are going to use TailwindCSS.
Unlike CSS-in-JS solutions that only provide the styling system or component libraries that give you opinionated component styles, TailwindCSS provides you with a set of unopinionated utility CSS classes that your components can leverage to build your User Interface, with the chance of extending them via configuration files.
Scaffolding our application
Note: We will use
yarnacross this guide, but feel free to usenpmif that is your personal choice.
Let's create a new Next.js application. While there is an official create-next-app CLI tool, we will manually scaffold our project to avoid removing unnecessary files created by it.
Create a new directory and cd into it.
mkdir nextjs-tailwindcss-example && cd $_
Initialize an empty package.json
yarn init -y
Install required dependencies
yarn add react react-dom next
Create a homepage in pages/index.js
By default, the Next.js filesystem router will pick all pages created in the pages directory and make them available as routes.
pages/index.js
export default function HomePage() {
  return (
    <main>
      <p>Next.js + TailwindCSS Demo</p>
    </main>
  )
}
Add dev, build and start scripts to our package.json
package.json
{
  ...
  "scripts": {
    "dev": "next",
    "build": "next build",
    "start": "next start"
  }
  ...
}
Now, let's run yarn dev to start your development server and navigate to http://localhost:3000 to preview your unstyled Home page.
Configuring TailwindCSS
We have a basic web application now, but its lack of styling, colors, and a nice font makes it look boring and lifeless.
Install TailwindCSS as a devDependency
yarn add tailwindcss --dev
Generate a TailwindCSS config file
Run yarn tailwindcss init to create a tailwind.config.js file if you want to later customize the default configuration or add more plugins. Additionally, if you are using the TailwindCSS VSCode Extension, you will get intellisense completions for your class names.
Create a Global Stylesheet
In order to import TailwindCSS utility classes, we need to create a stylesheet in styles/main.css, where we will use the @tailwind directive to import all the required classes and set up some global styles.
@tailwind base;

@tailwind components;

@tailwind utilities;

body {
  @apply bg-gray-200;
  @apply font-sans;
  @apply text-gray-900;
}
Import the Global Stylesheet
To add a Global Stylesheet, we need to create a custom App and import it there.
_pages/app.js
import '../styles/main.css'

export default function MyApp({ Component, pageProps }) {
  return <Component {...pageProps} />
}
Configure PostCSS
If you run yarn dev and navigate to http://localhost:3000, you will see an unstyled page like the following:
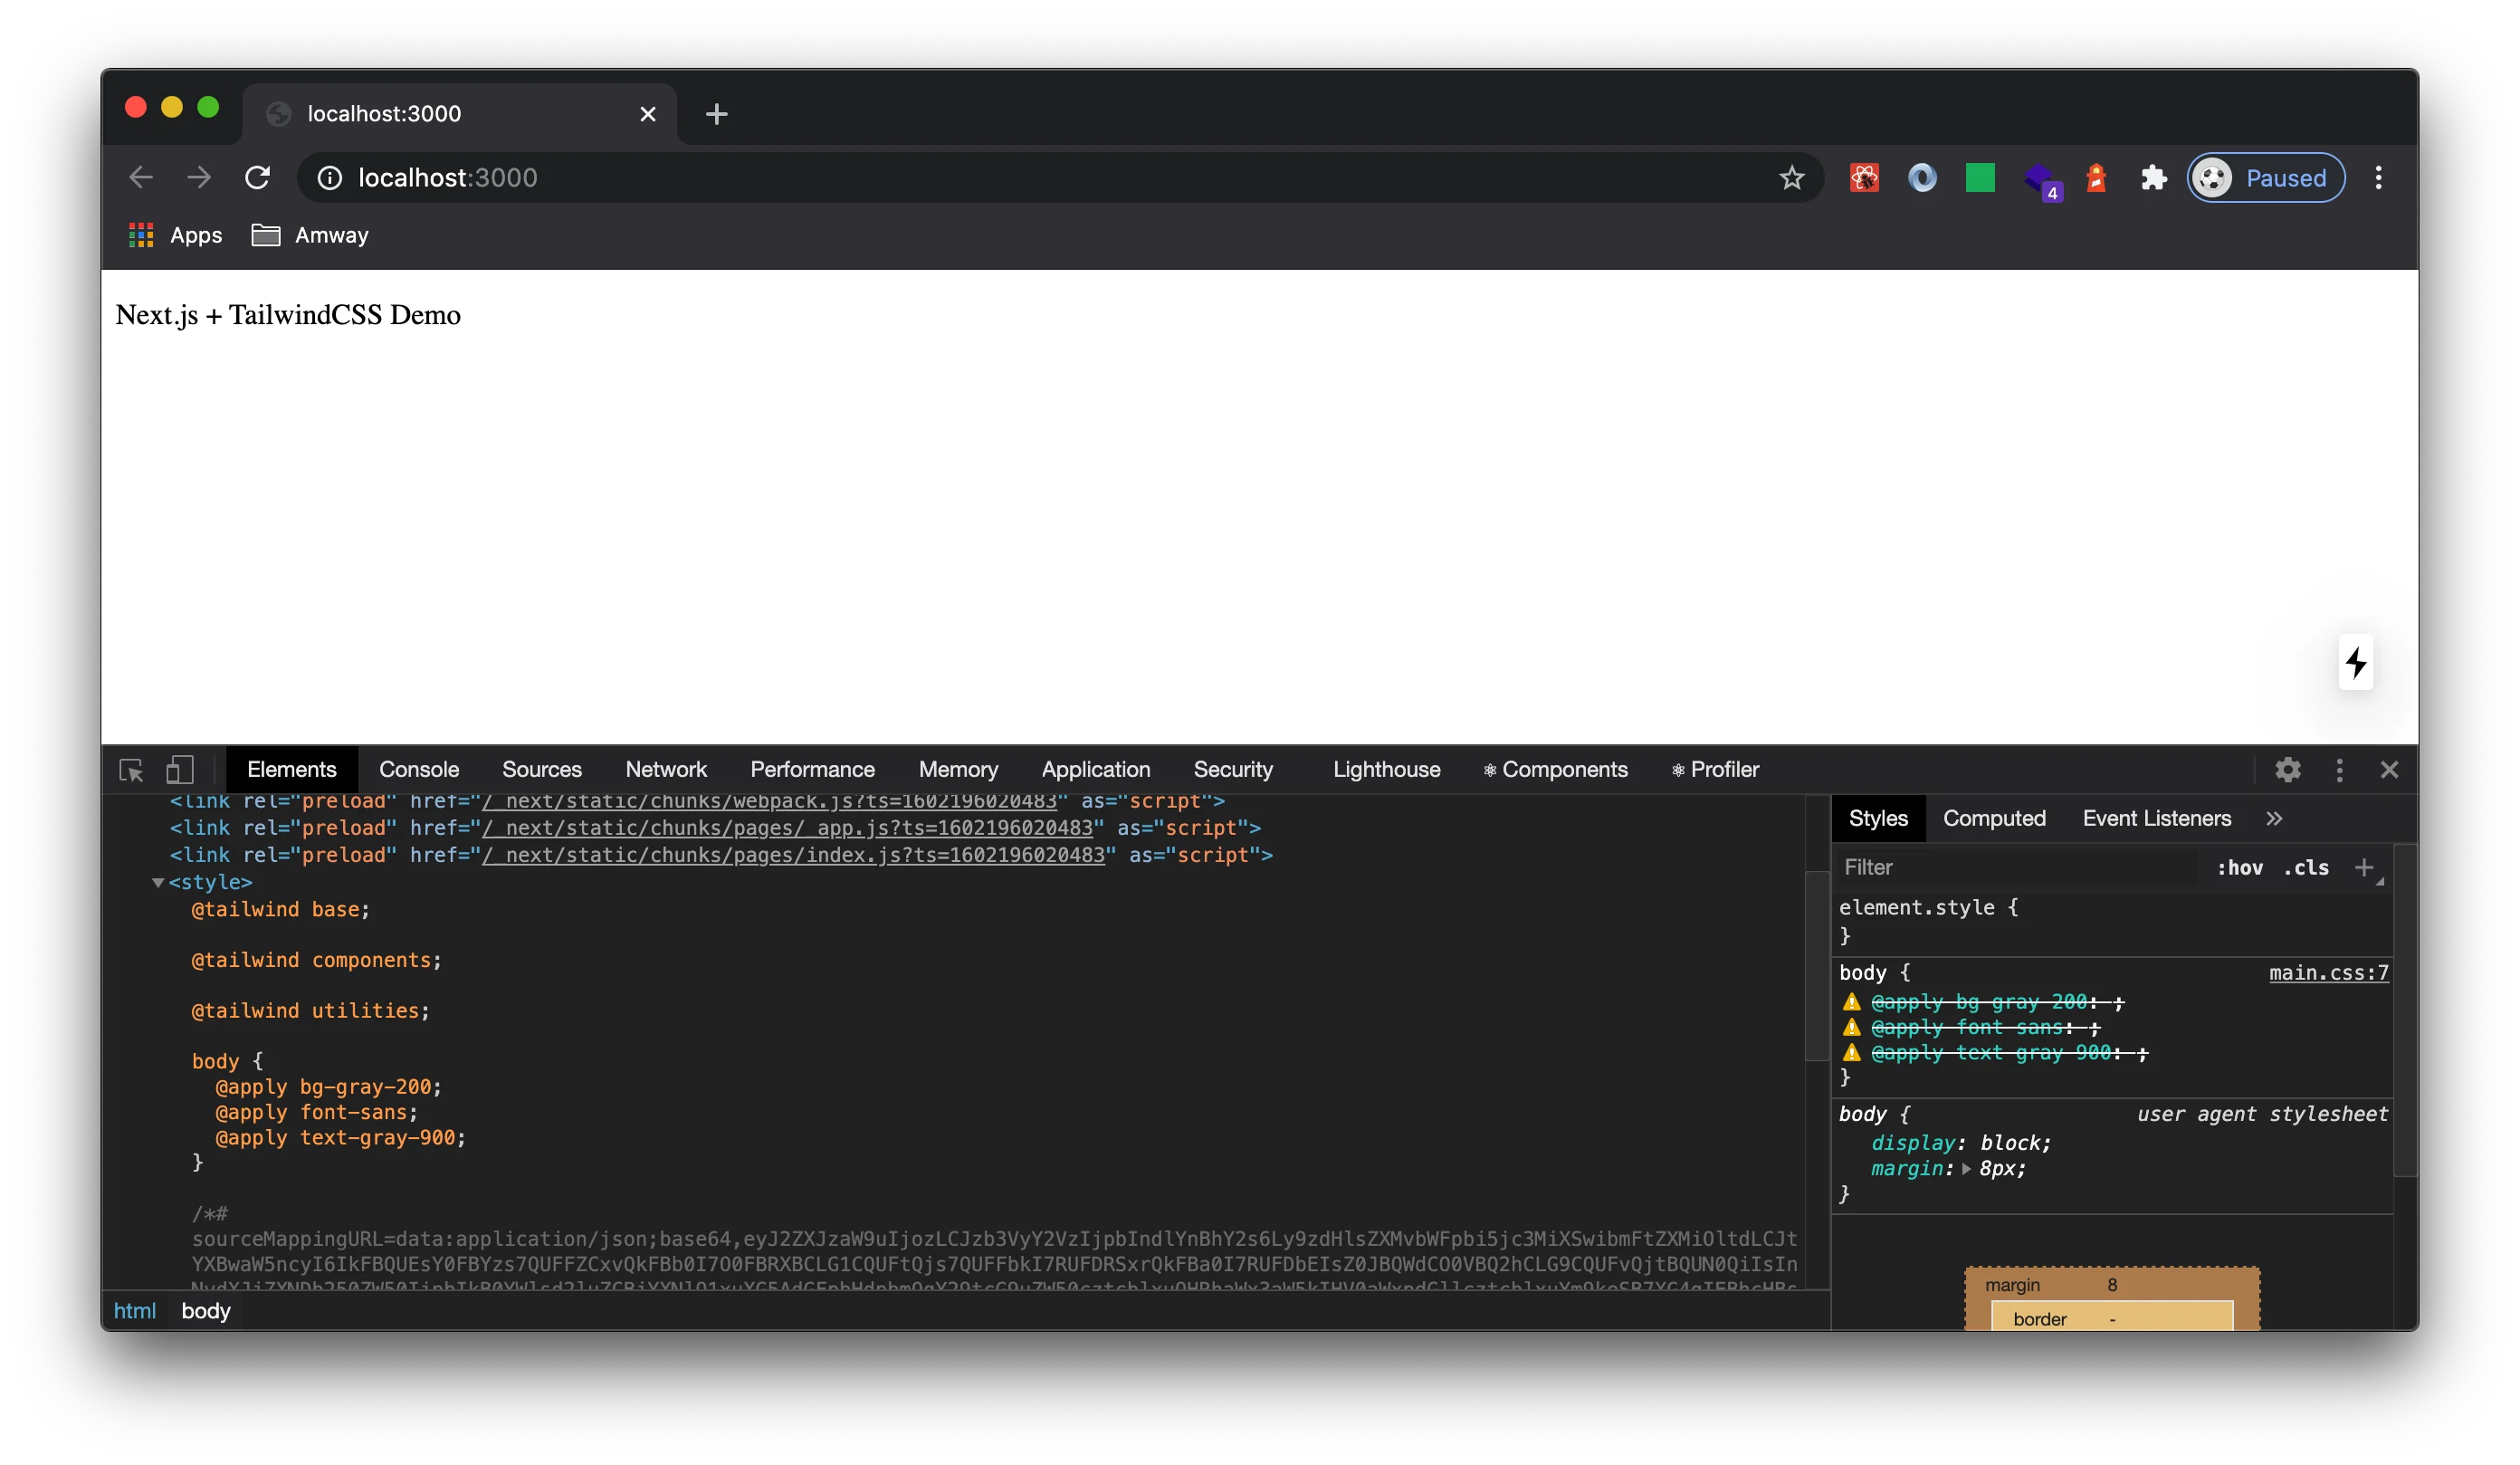
This is happening because Next.js doesn't know (yet!) what to do with the @tailwind and @apply directives. For that, we will leverage Next.js's built-in PostCSS support to parse our CSS file. Create a postcss.config.js file in your project root with the following code:
postcss.config.js
module.exports = {
  plugins: ['tailwindcss'],
}
Now, let's restart our development server to see it working:

Adding More Styles
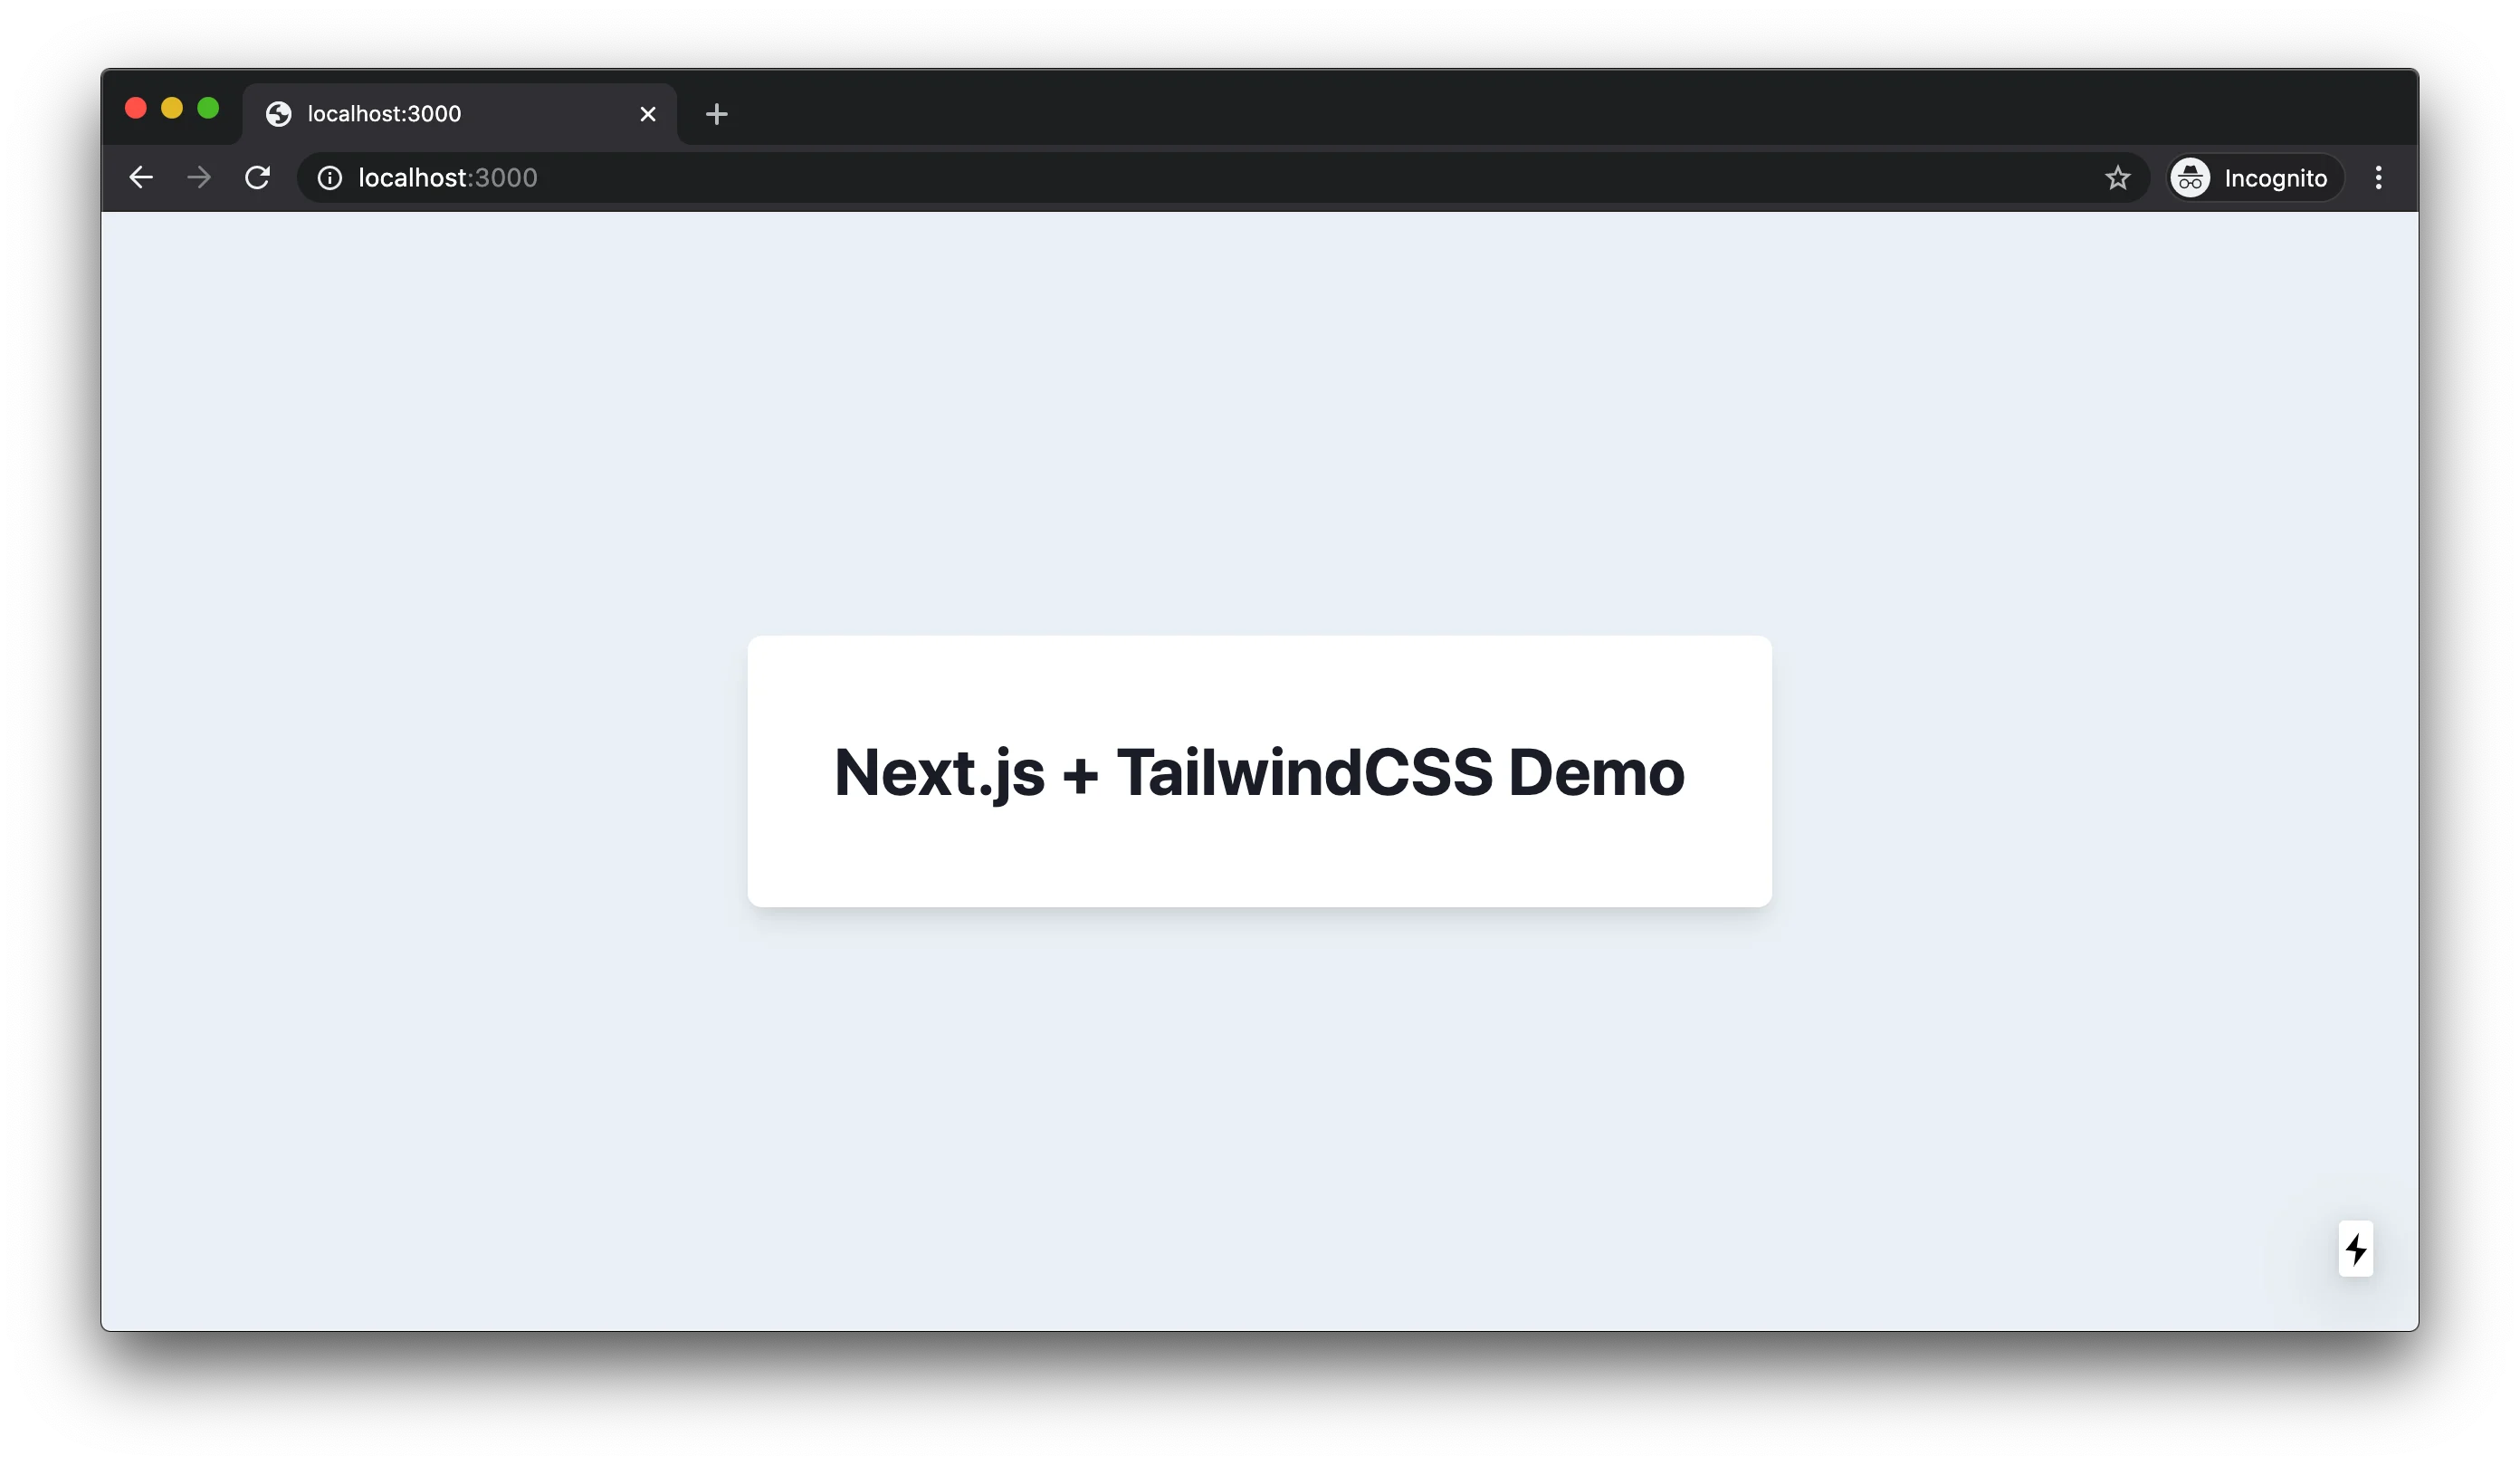
Now that our TailwindCSS config is working and PostCSS is compiling, we can start consuming those rules in our app routes. Let's edit our Home Page to make it look better.
pages/index.js
export default function HomePage() {
  return (
    <main className="min-h-screen flex items-center justify-center">
      <p className="shadow-lg rounded-lg bg-white p-12 text-4xl font-bold">
        Next.js + TailwindCSS Demo
      </p>
    </main>
  )
}
It should look like this:
Optimizing Build Result
Our Next.js project is successfuly set up to use TailwindCSS 🎉. However, we can still run some optimizations to make it work with all browsers and reduce final CSS file size.
Polyfill modern CSS
Most modern webapps use modern CSS features that old browsers does not support, and manually covering all cases can be frustrating, time-consuming and pointless since we have tools like PostCSS Preset Env that can automate the process.
Install postcss-preset-env
yarn add --dev postcss-preset-env
Add postcss-preset-env as a plugin to postcss.config.js
postcss.config.js
module.exports = {
  plugins: ['tailwindcss', 'postcss-preset-env'],
}
Refer to the postcss-preset-env documentation for more details on how it works and what it solves.
Purge unused utility classes
If we run the yarn build command, we will notice some warnings from the PostCSS step:
warn - Tailwind is not purging unused styles because no template paths have been provided.
warn - If you have manually configured PurgeCSS outside of Tailwind or are deliberately not removing unused styles, set `purge: false` in your Tailwind config file to silence this warning.
warn - https://tailwindcss.com/docs/controlling-file-size/#removing-unused-css
This is happening because the final build is including all of the TailwindCSS utility classes, which will create a huge StyleSheet and we don't want to slow down the page load for our users.
Luckily, TailwindCSS config has an option to control the file size that we can leverage by configuring the purge property of our tailwind.config.js file.
tailwind.config.js
module.exports = {
  // Other config...
  purge: ['./components/**/*.{js,jsx,ts,tsx}', './pages/**/*.{js,jsx,ts,tsx}']
}
By using that configuration, PostCSS will analyze the code within components and pages directories, extract class names and match them with our generated TailwindCSS utility classes. This means the final CSS file will only have the neccessary classes to work and no dead code ✨.
Moving forward
We have concluded our mini guide on how to Supercharge your Next.js Development with TailwindCSS. Pretty easy, right? I personally think the folks at Vercel have been really working hard to make integrations like this as seamless as possible.
If you want to keep digging into the available utility classes, how to customize your configuration, add more variants or even create your own plugins, refer to the TailwindCSS documentation.
Also, if you just want a sneak peak on what you can do with TailwindCSS without creating a new project, go to the Tailwind Play tool where you will be able to try it in your browser.
If you want a finished code sample, refer to this GitHub repository.